Table of Content
Introduction
I got the hero10 for its frame rate (4K 120fps, 5.3K 60fps). I love it! It’s too heavy for sub 250g drone so we take it apart. Once apart you soon realize that overheating is an issue. Since lots of pilot use this camera for work and we want reliable and consistent gear. Since we all live and fly in different environment and temperature we all different experience with naked hero 10. This case will make this experience consistent.
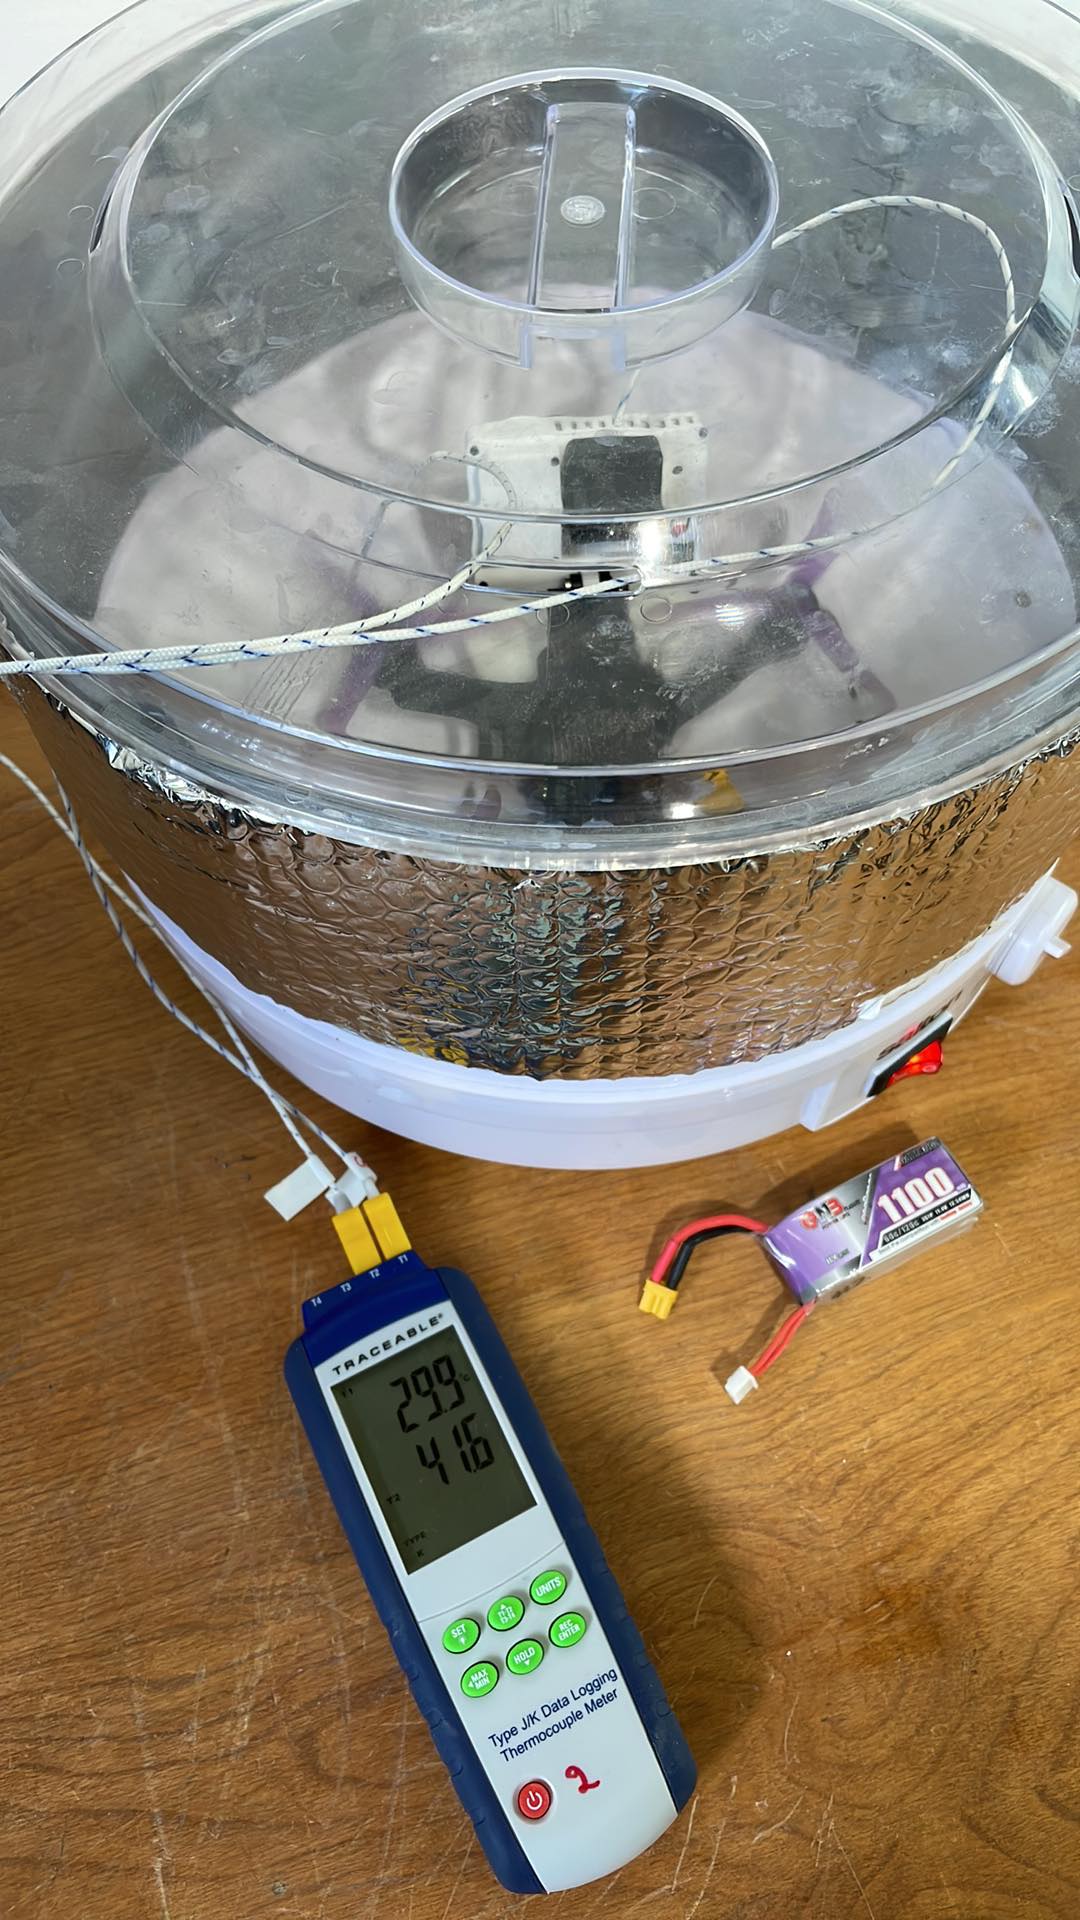
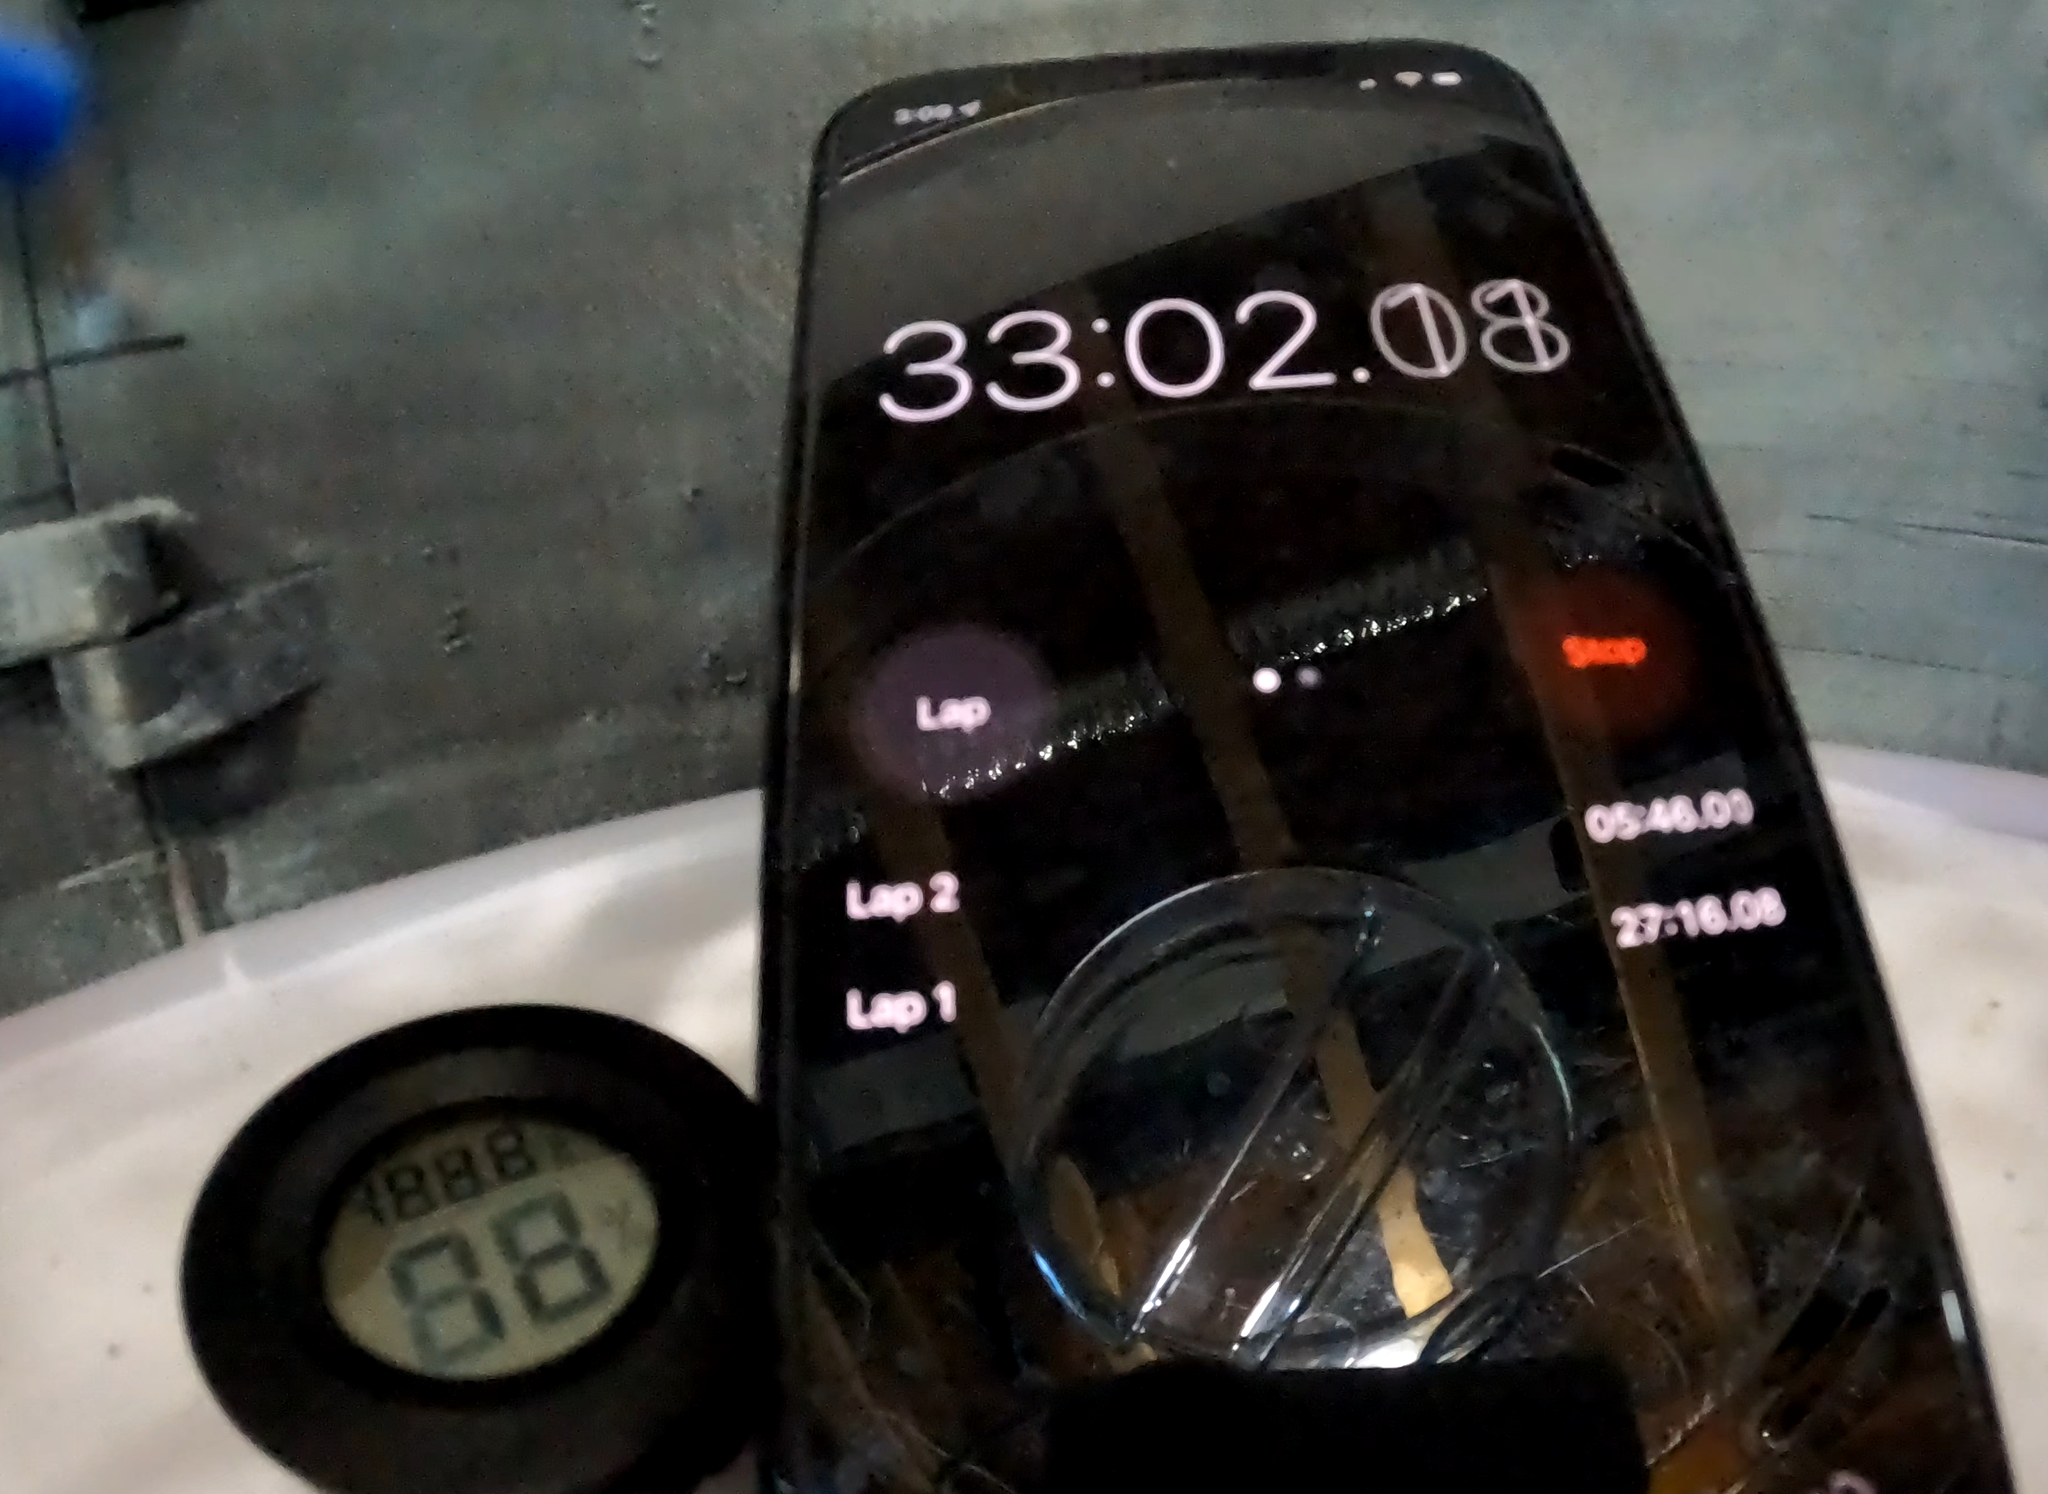
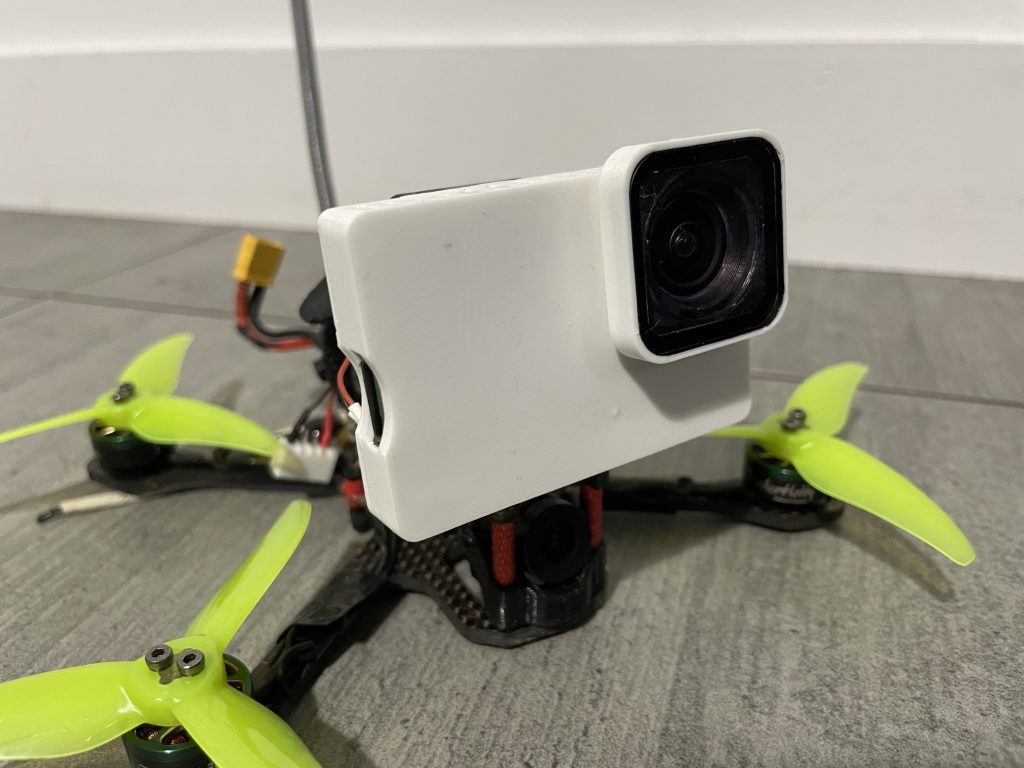
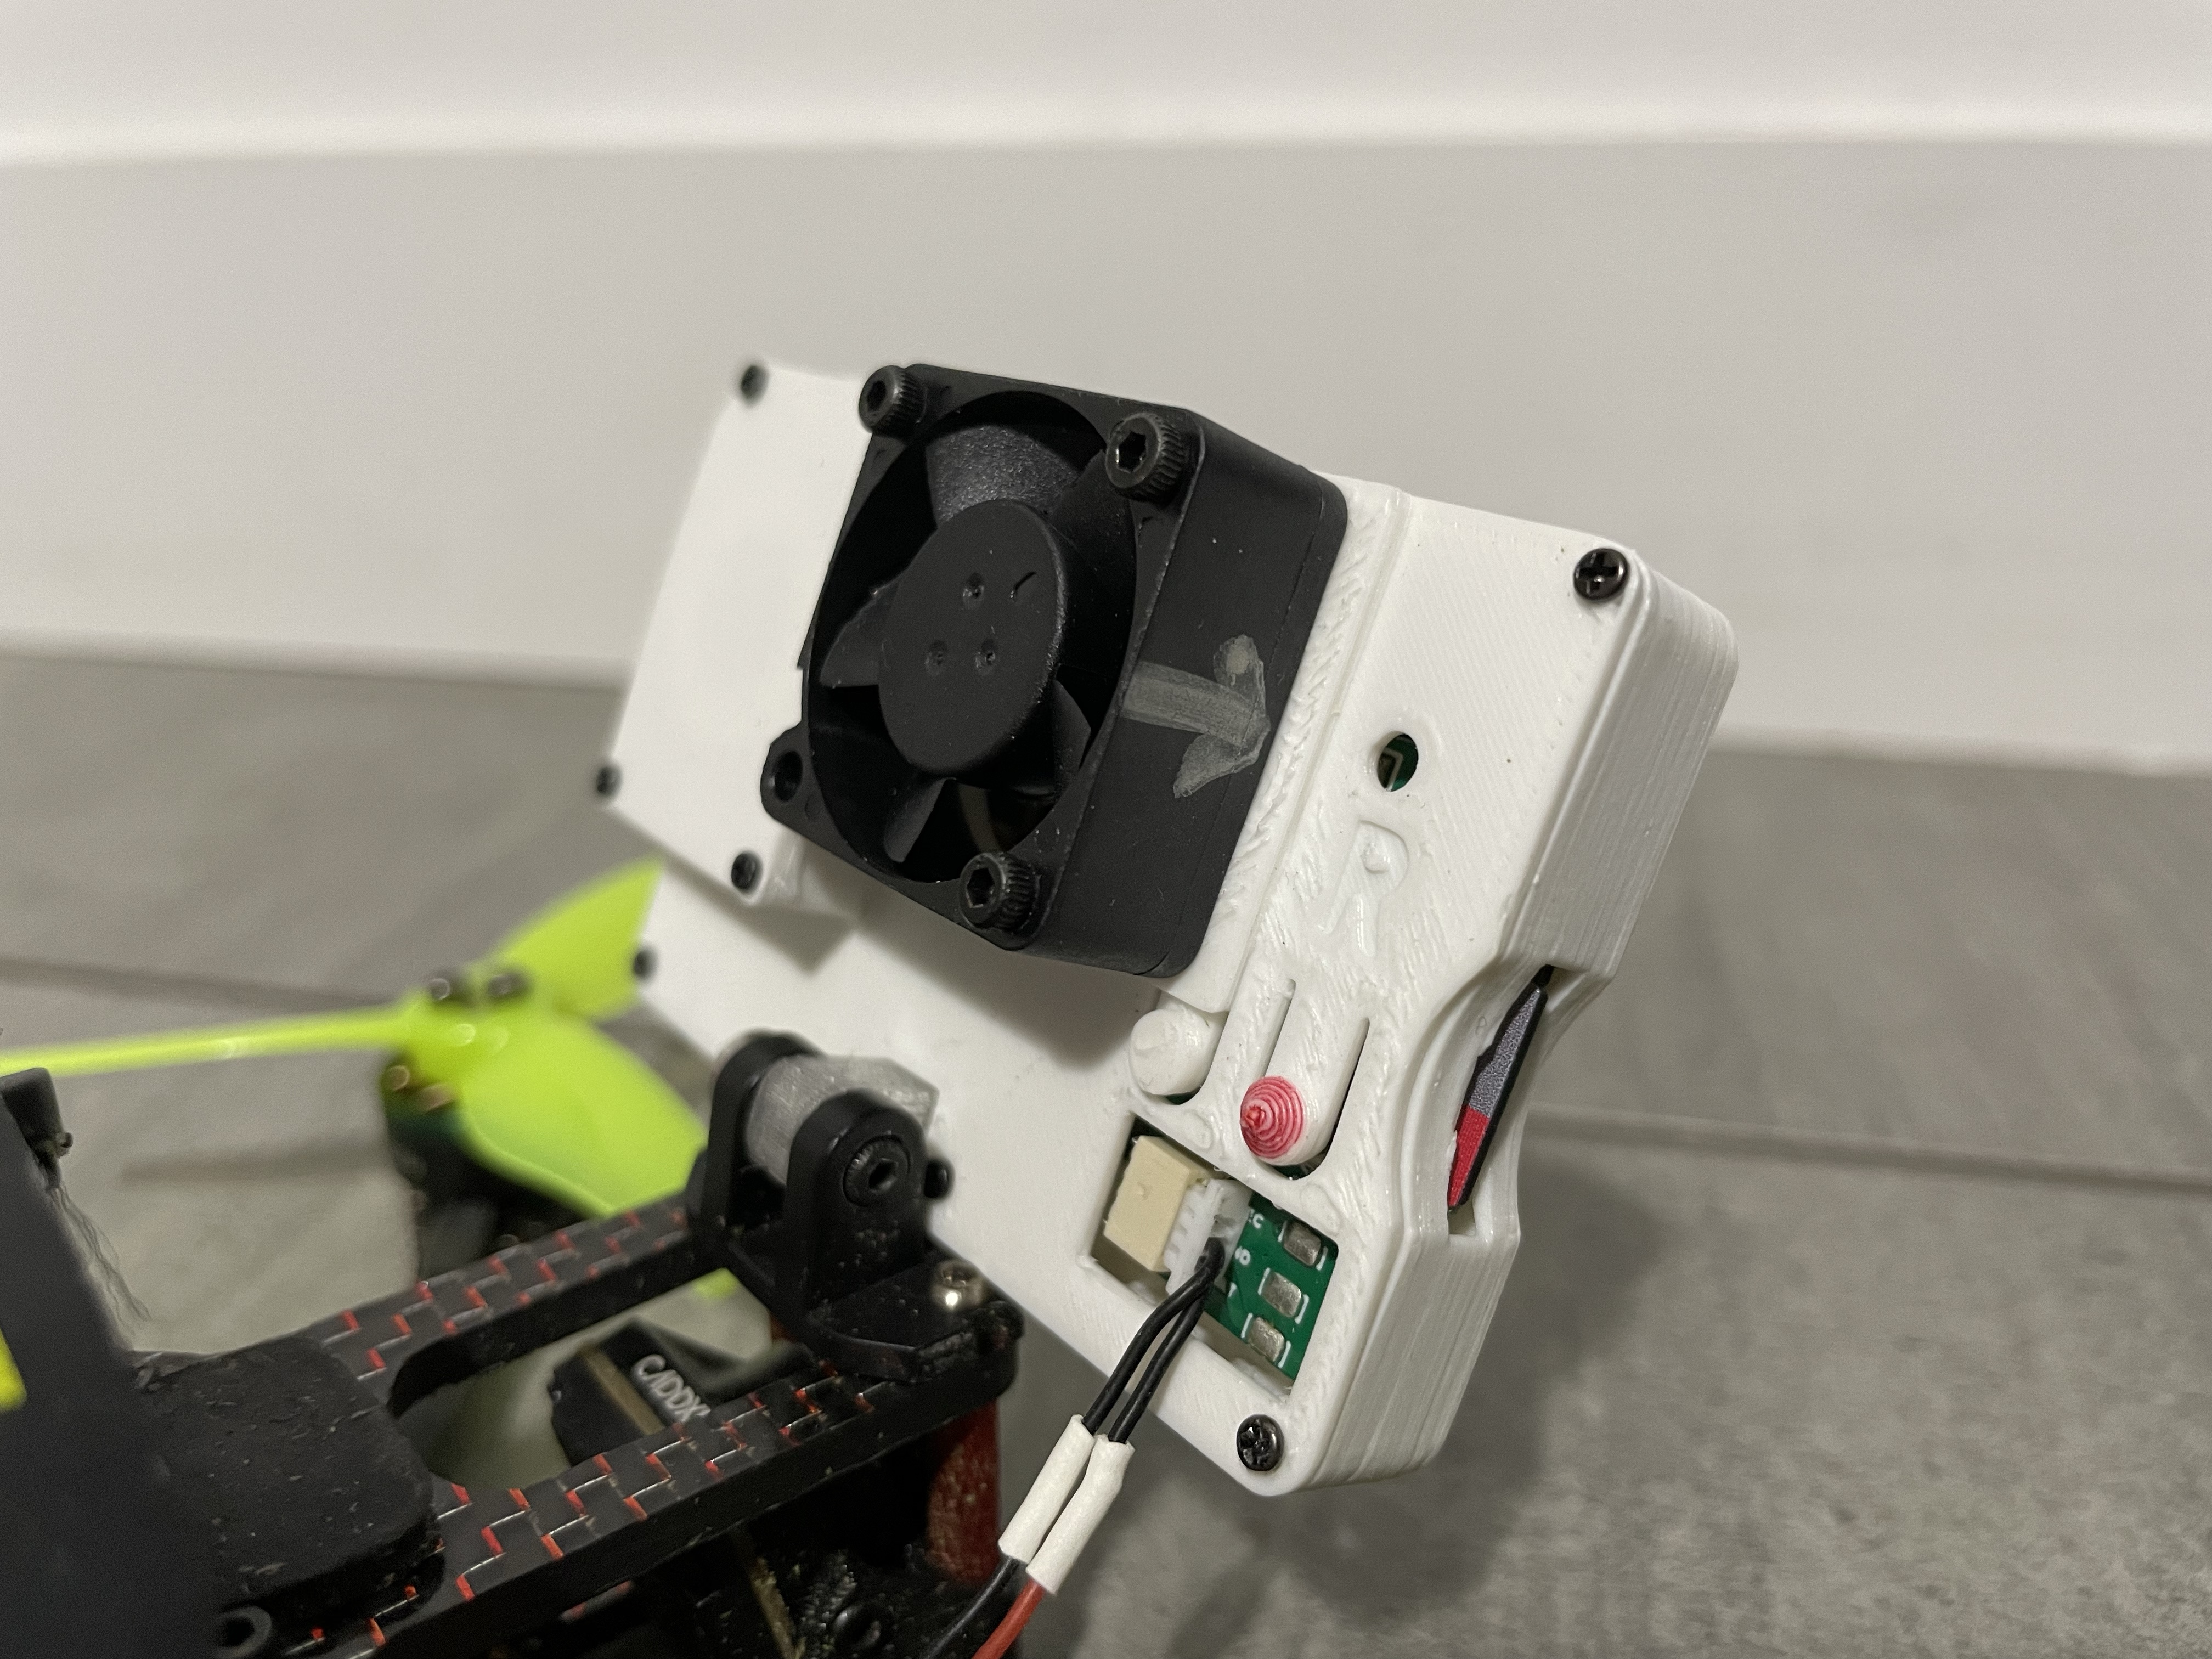
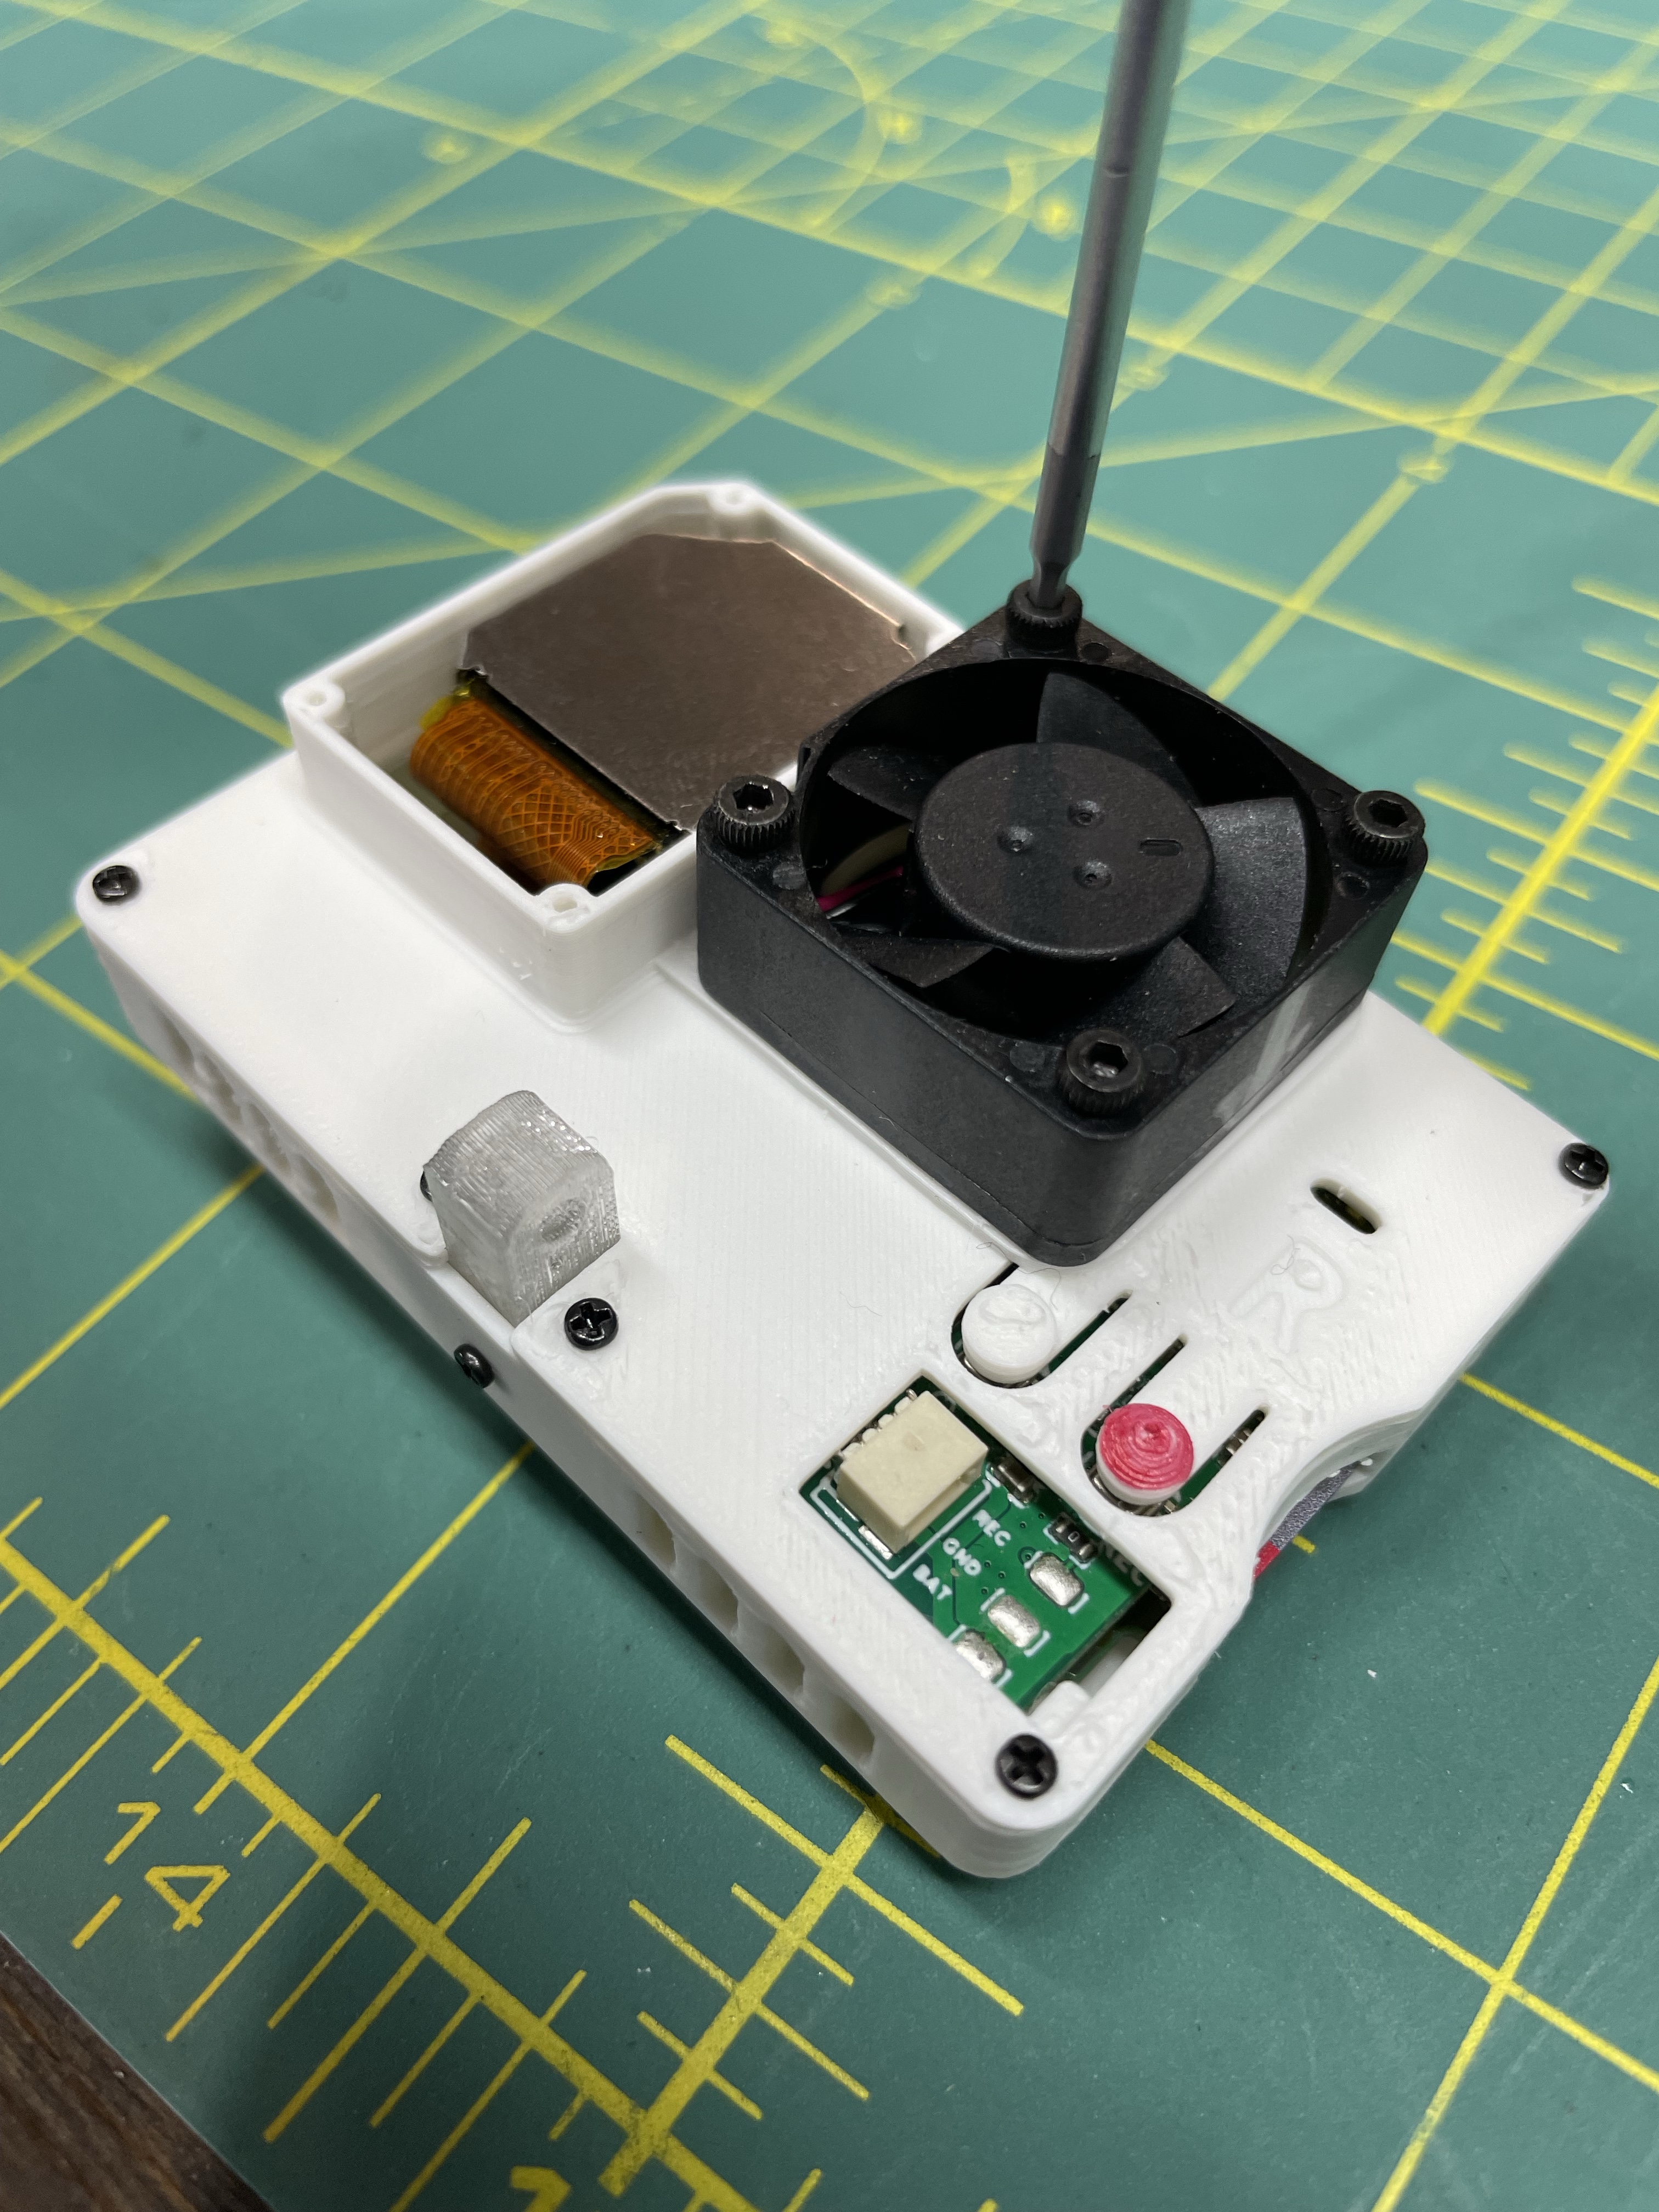
I design this 3D printed case that has build in fan to blow air directly onto PCB. To prove this design, I place the entire GoPro into a heat chamber at 40C (100F) and let the camera rise to that temperature before pressing record. I was able to record 33min. I thought that was max record time until I saw my SD card was full! 🙈 Go check the testing section to see my setup.
—This article is still work in progress.—
To do:
- improve part list
- show initial prototype (small fan)
- GoPro hero10 teardown video
- heatsink vs fan explanation and heating the back vs the front of the GP2 chip
Show pictures and results of heat chamber test- work on front LCD mount options
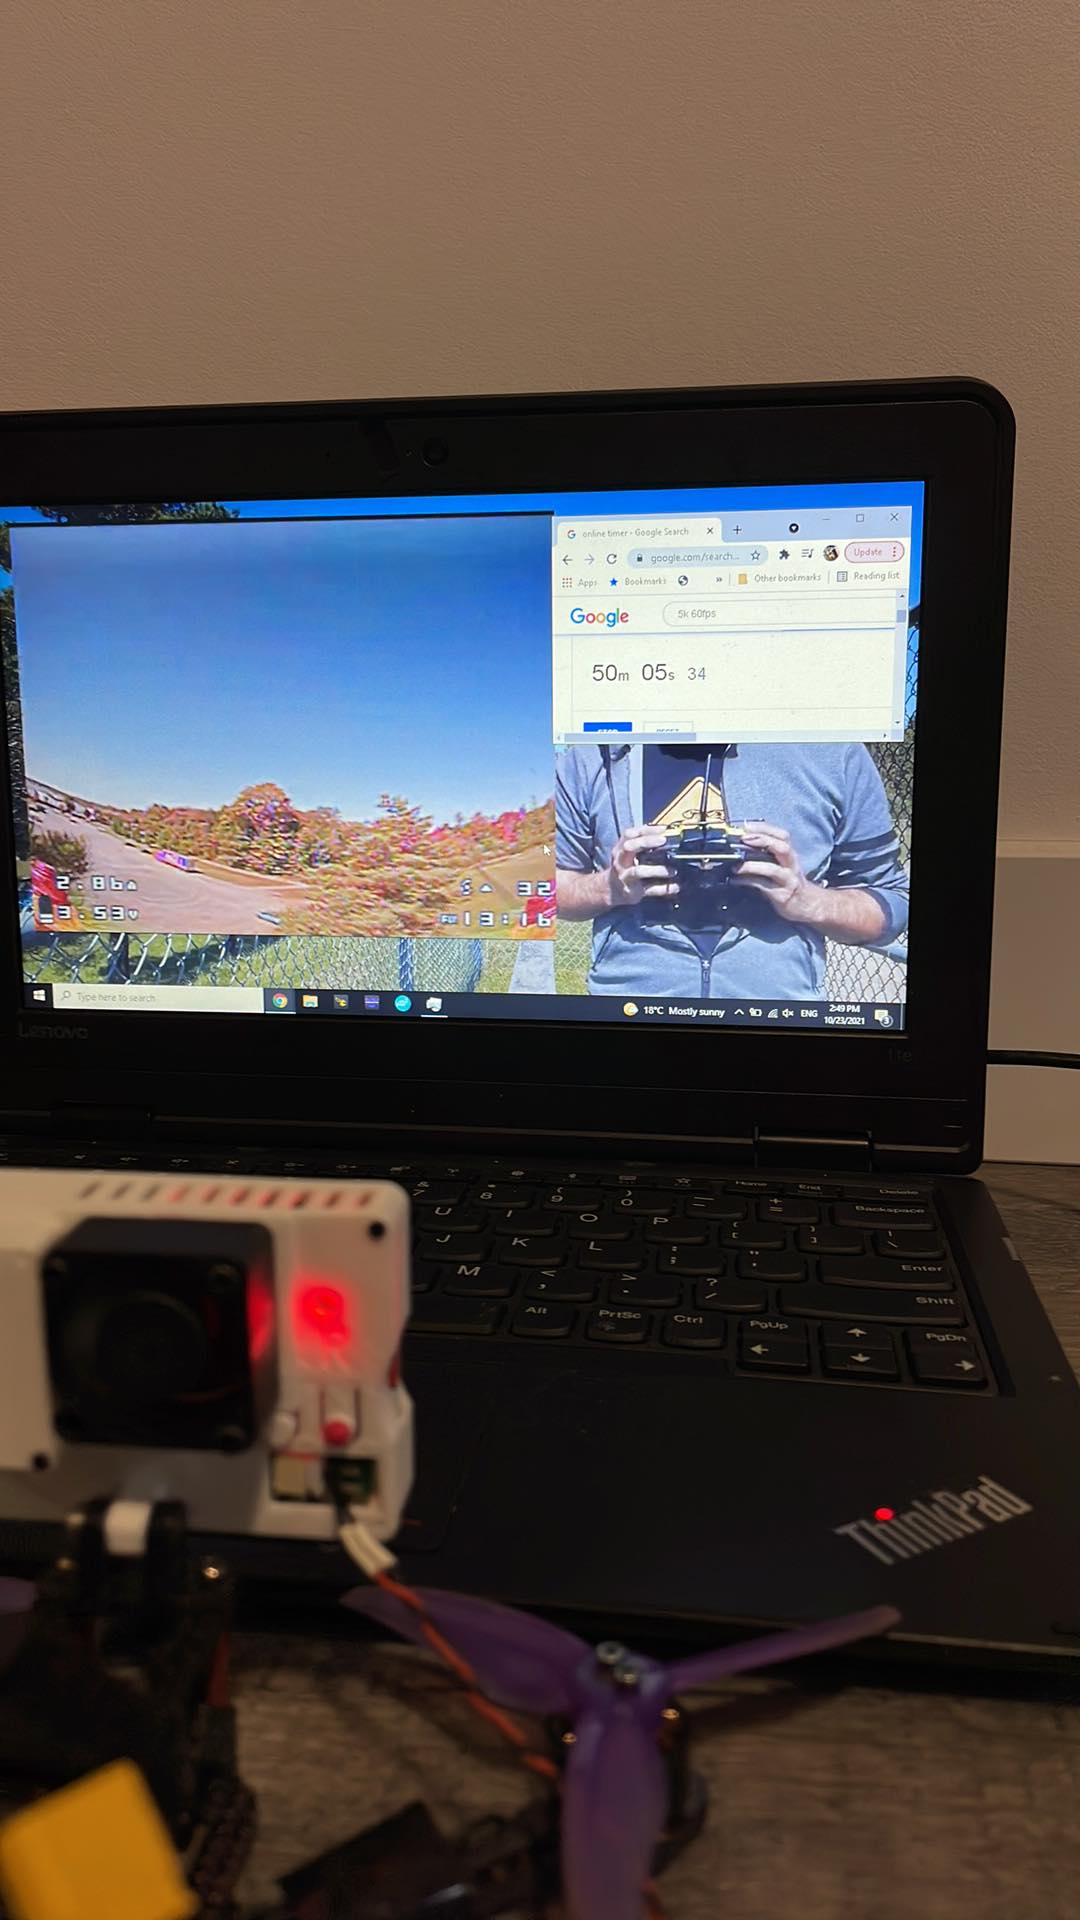
- explain little bit about recording settings use during my tests
- flat hero 10 design
- back LCD slot

Parts List
- 1 x Fan 25x25mm 5V I use this one from Digikey but I think you can easily find some elsewhere like aliexpress.
- screws (I need time to make the list of all the screws needed for this build) Mostly M1.4 plastic screws
- 4 x M3 11-12mm long screws to attach the fan
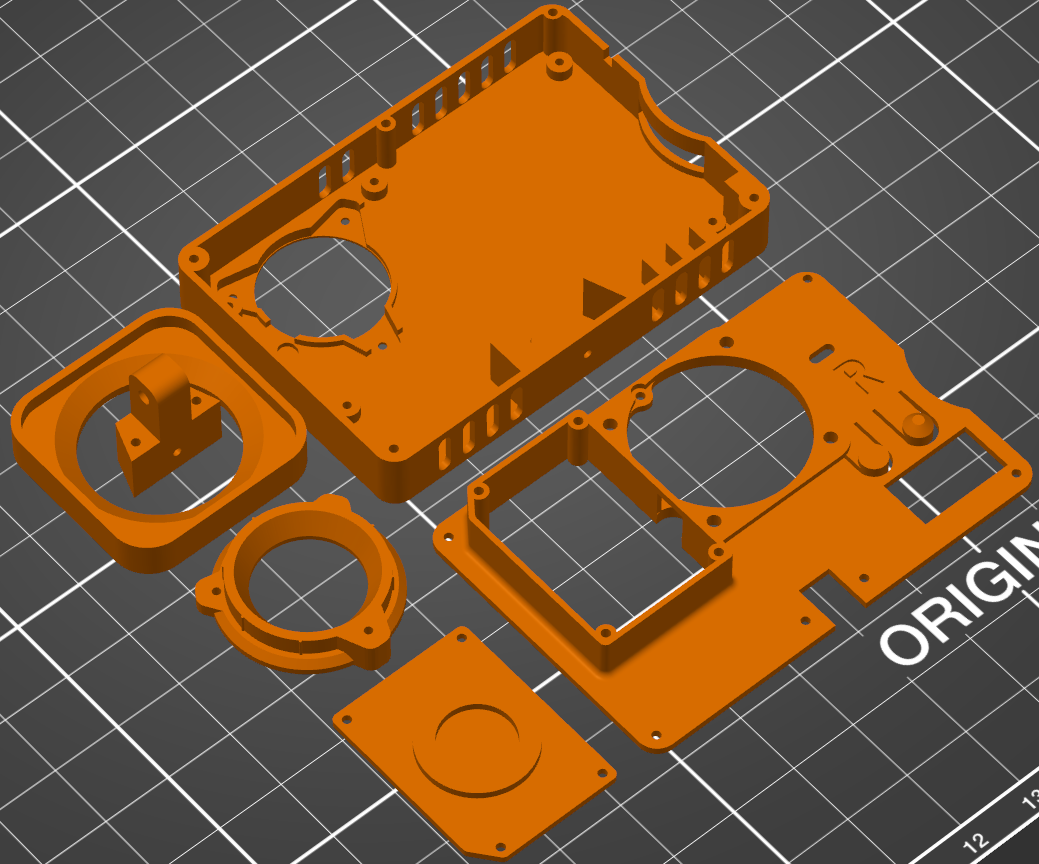
3D printing
The most important thing with this project is to be easy to print. I work hard to figure out a clean way to design this case and be super easy to print with NO support!! https://www.thingiverse.com/thing:5080770

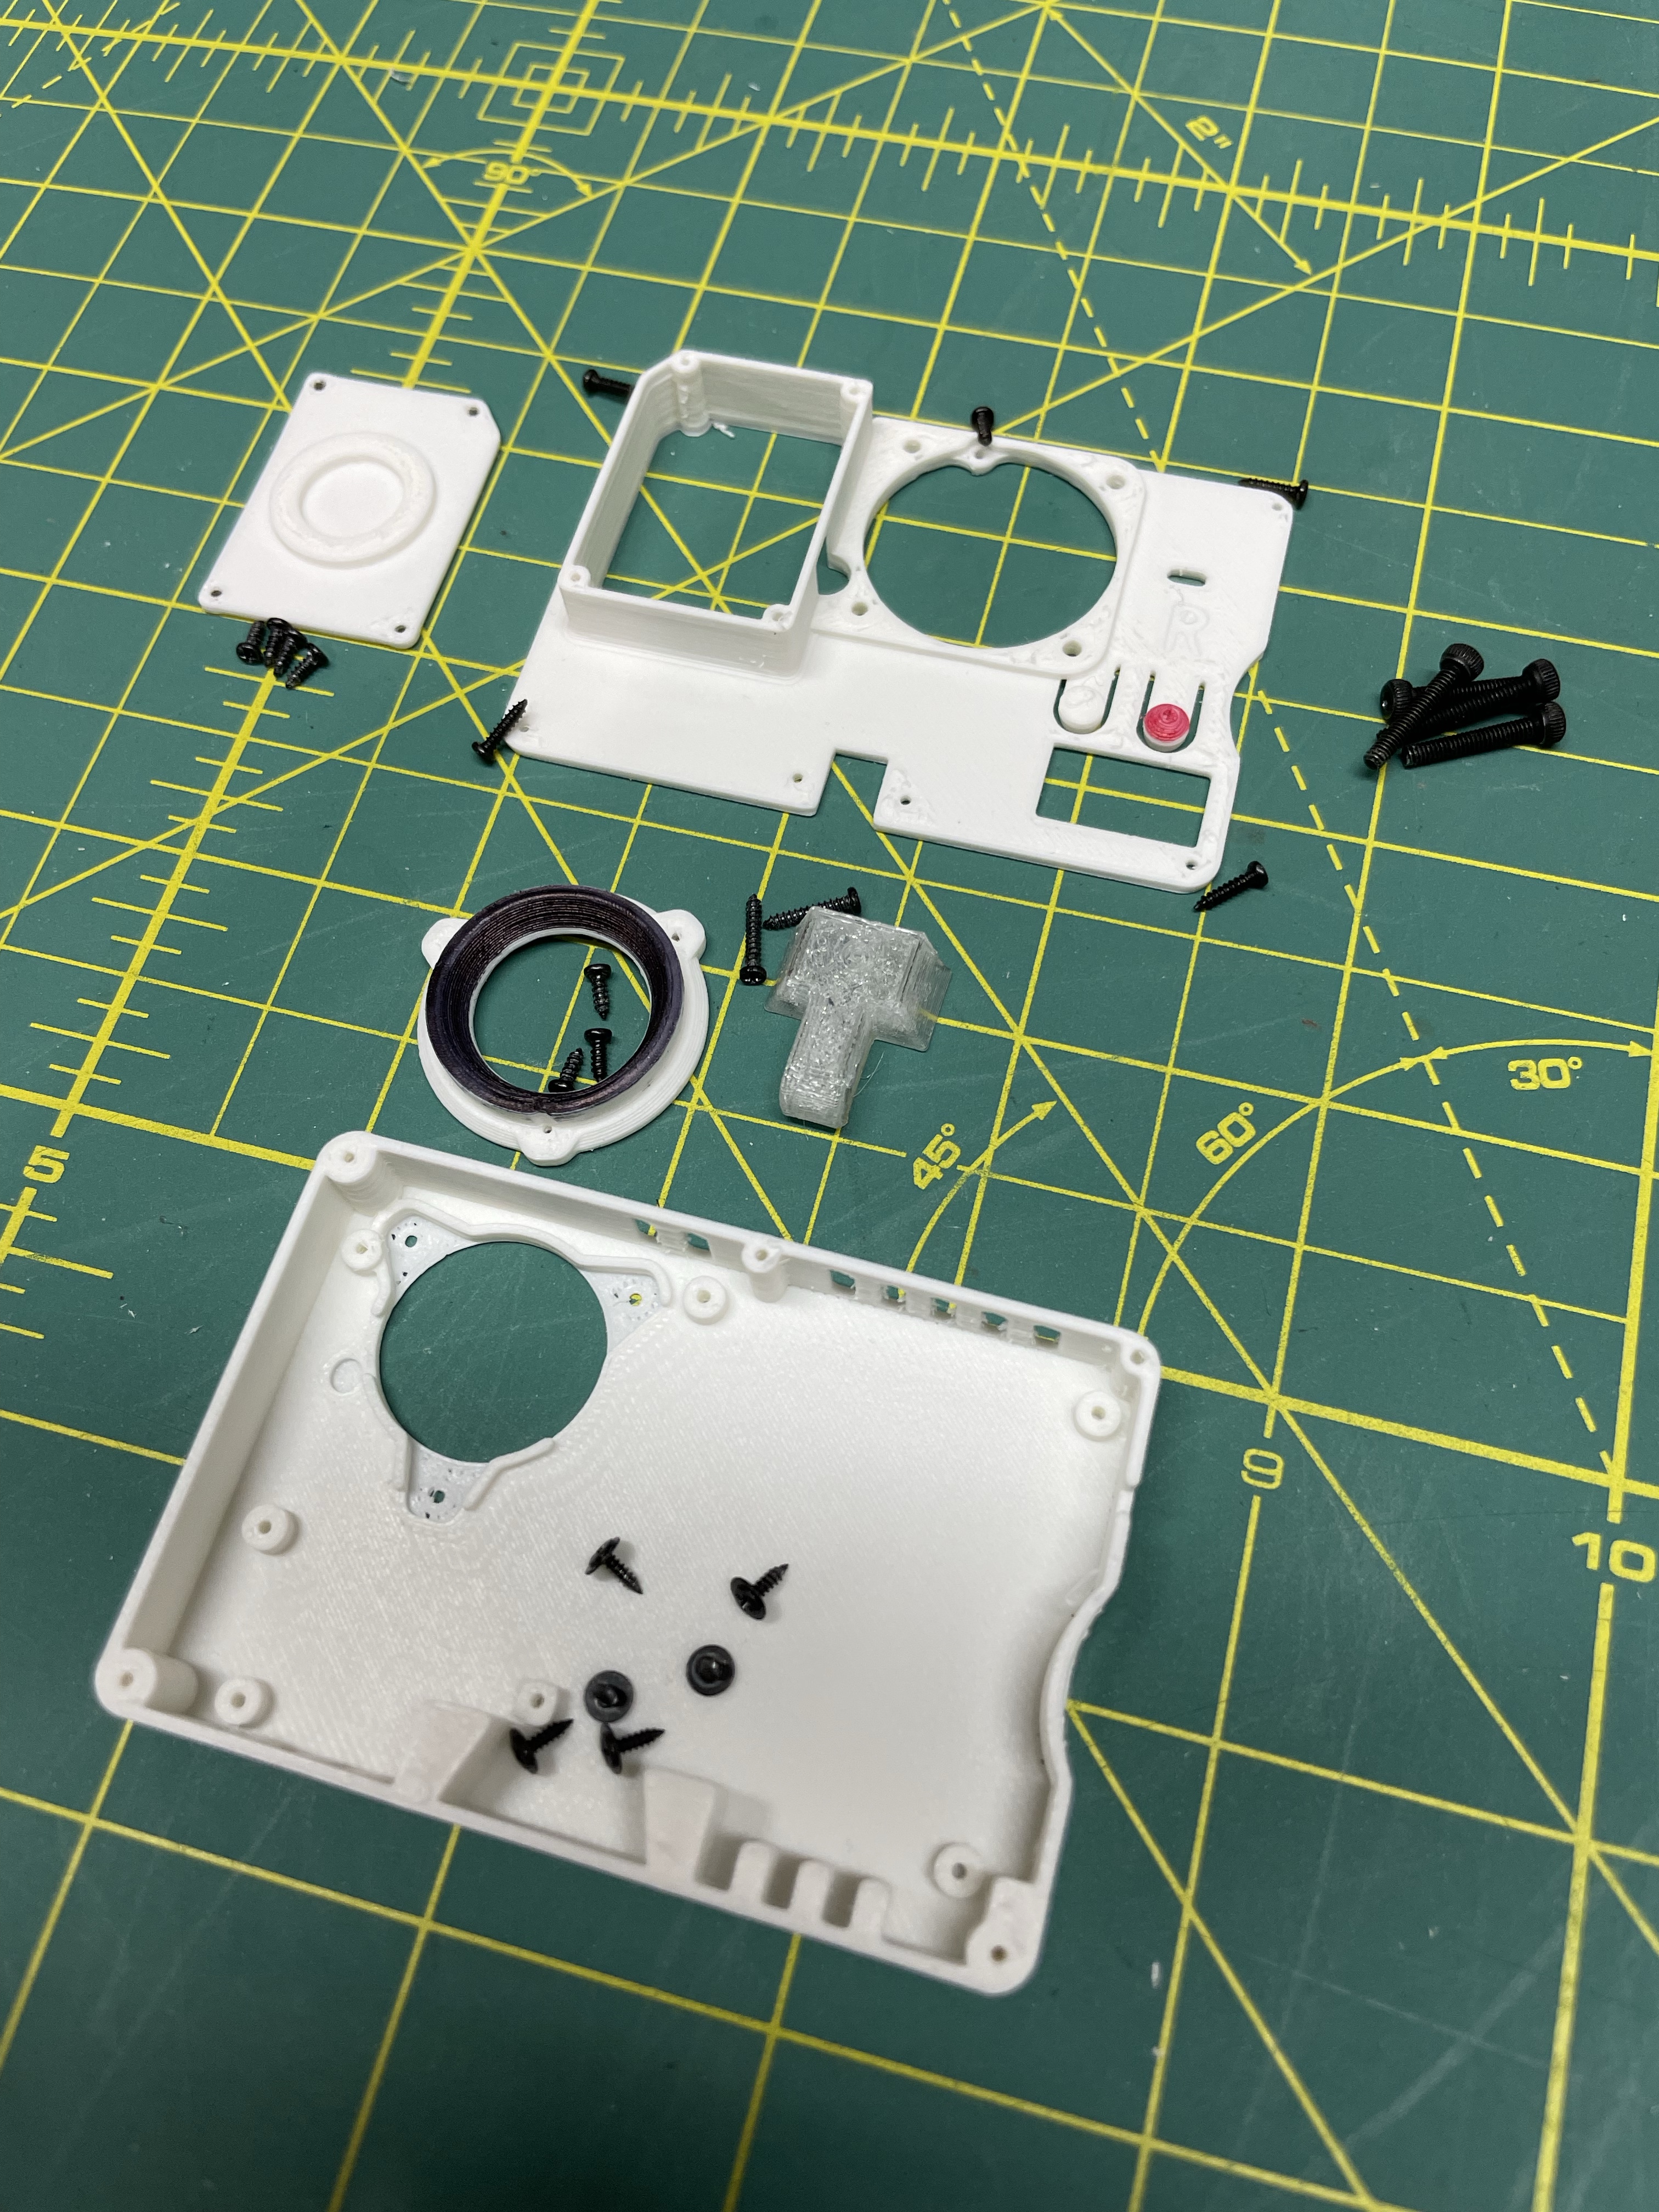
Assembly
Here are the steps to assemble it.

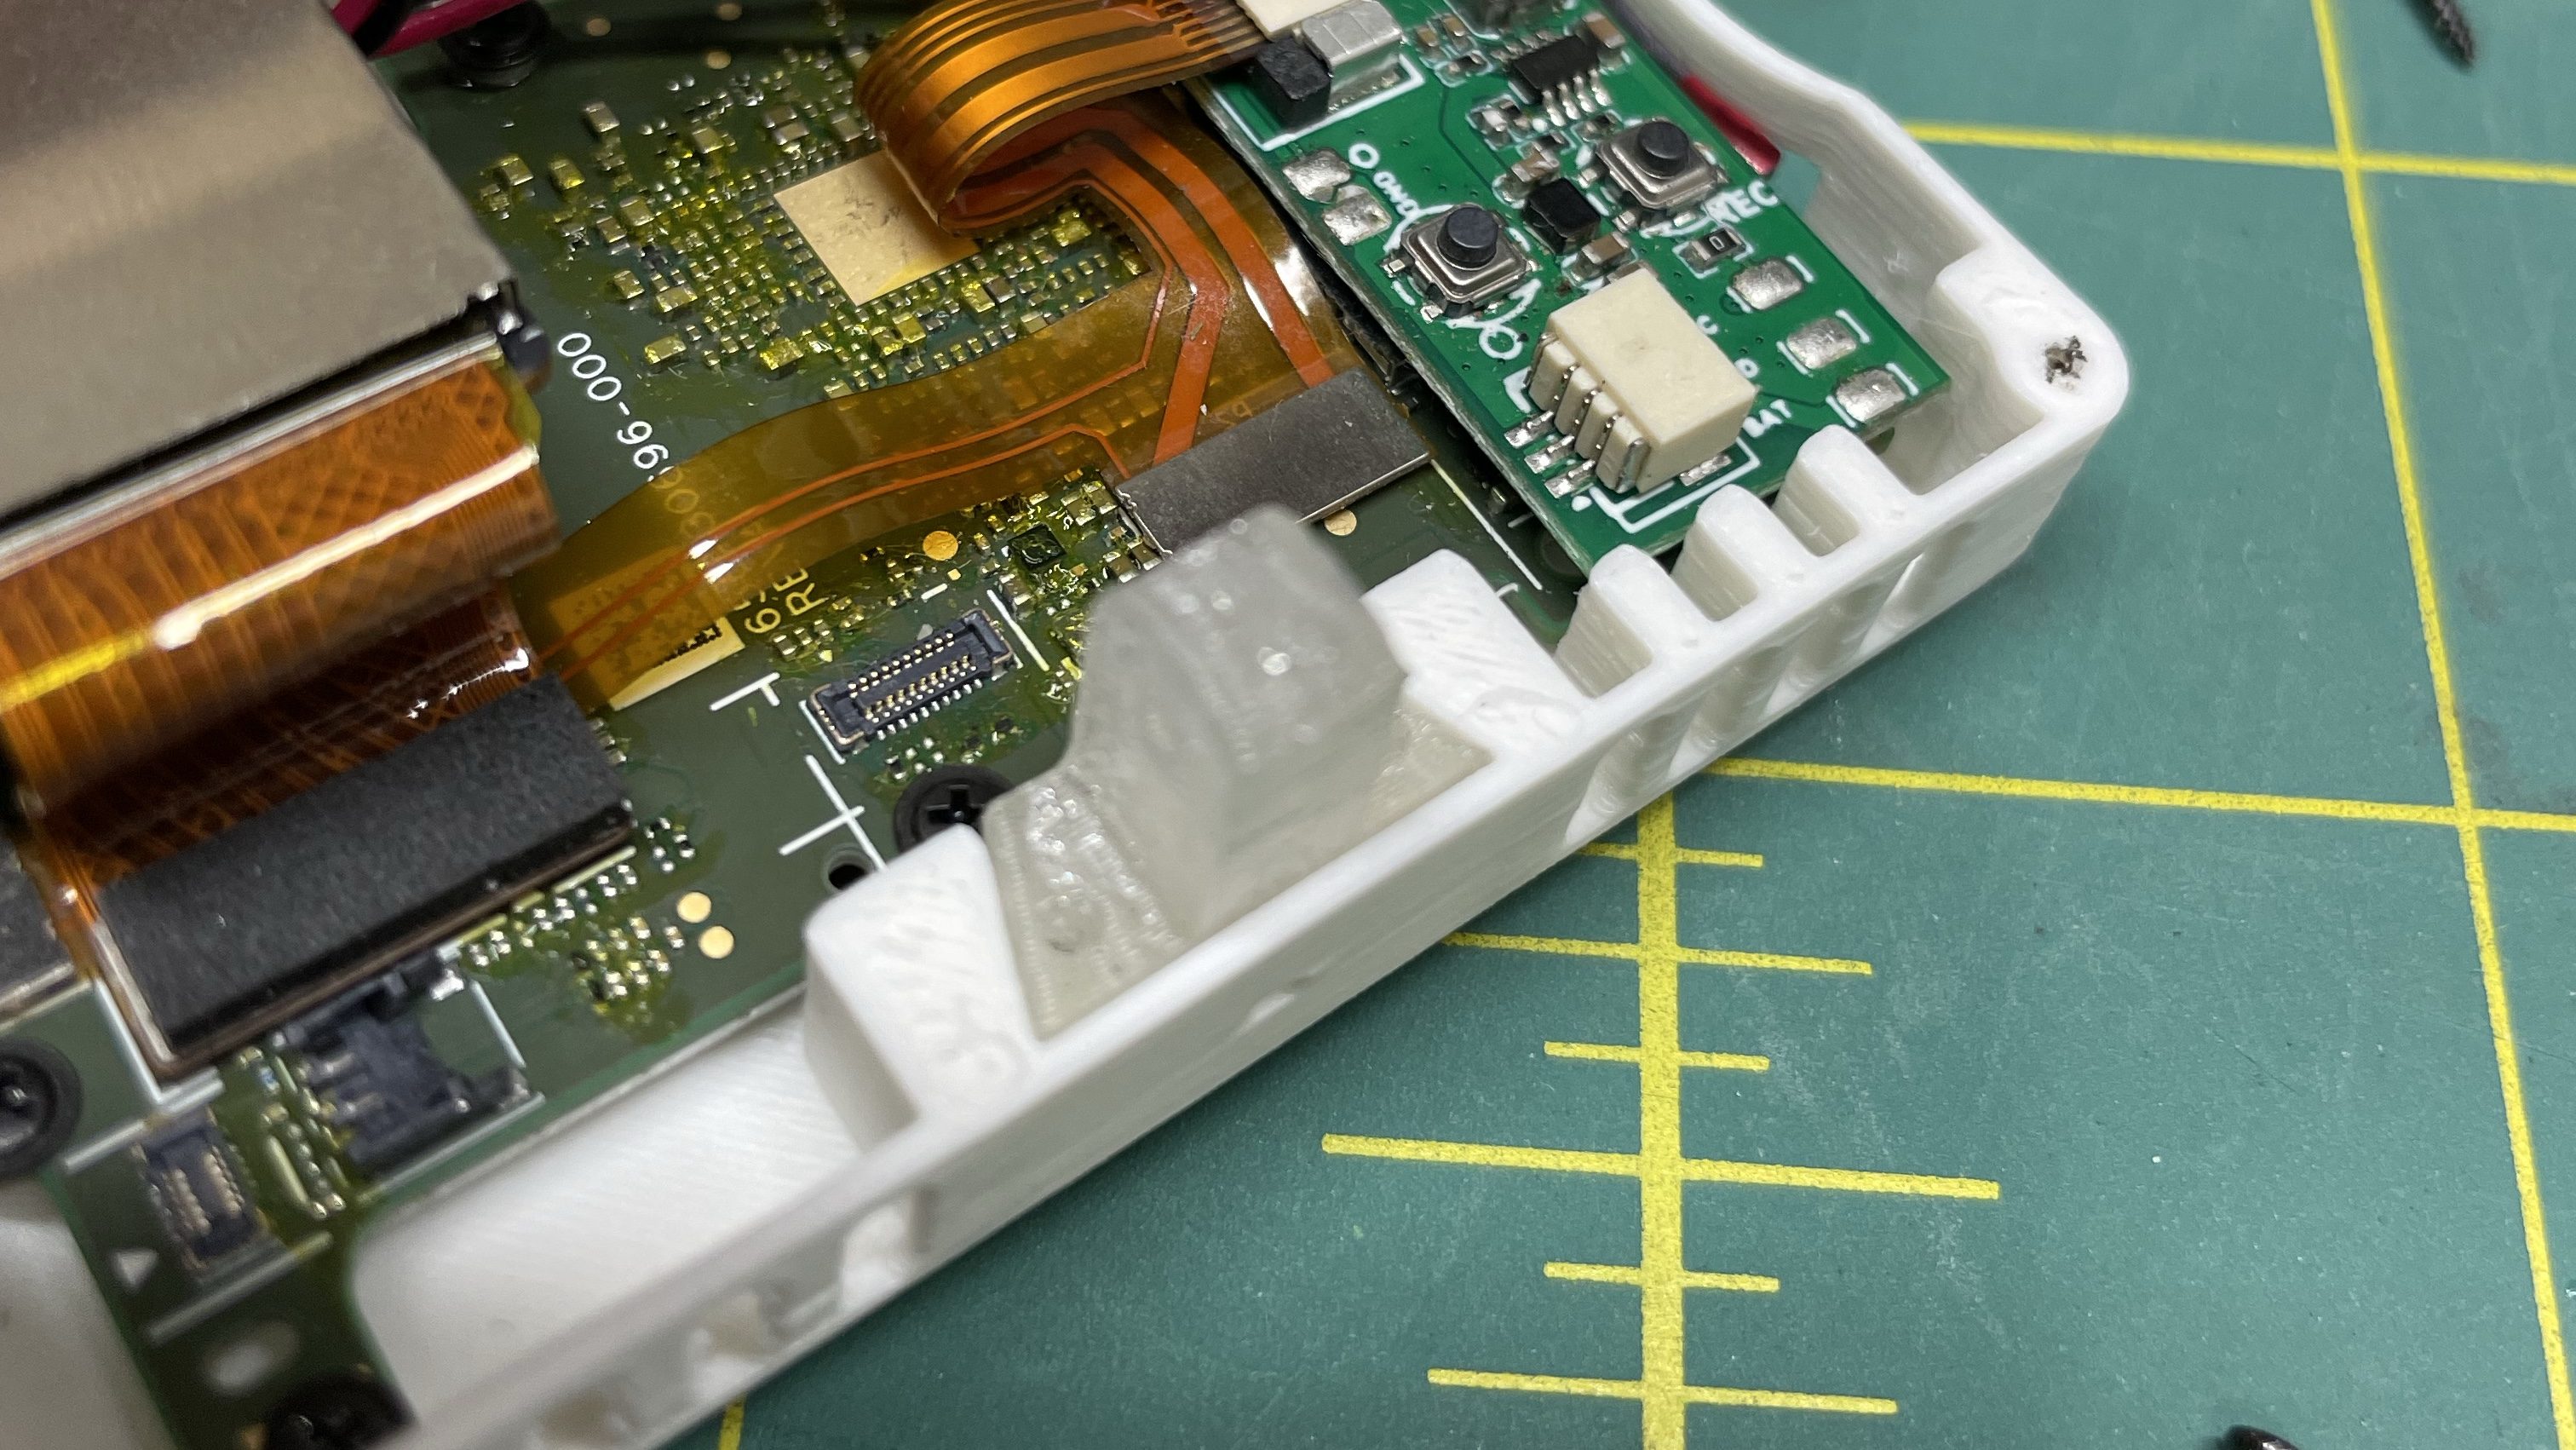
This screw is very tricky. You need to gently bend the camera lens cable. 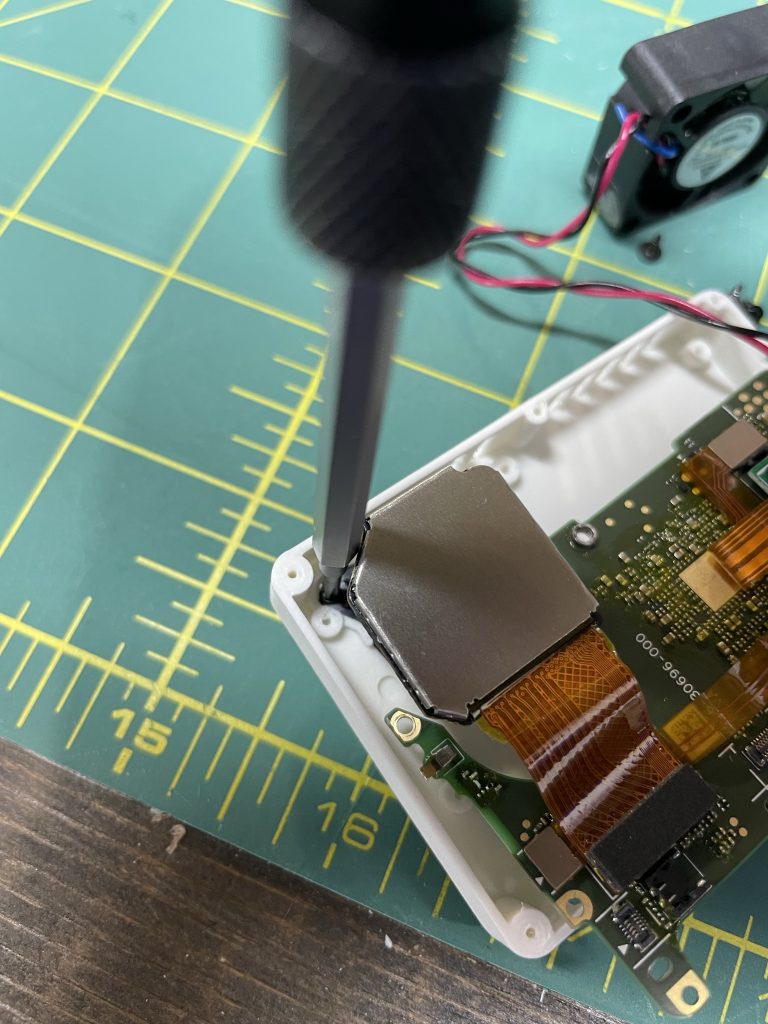
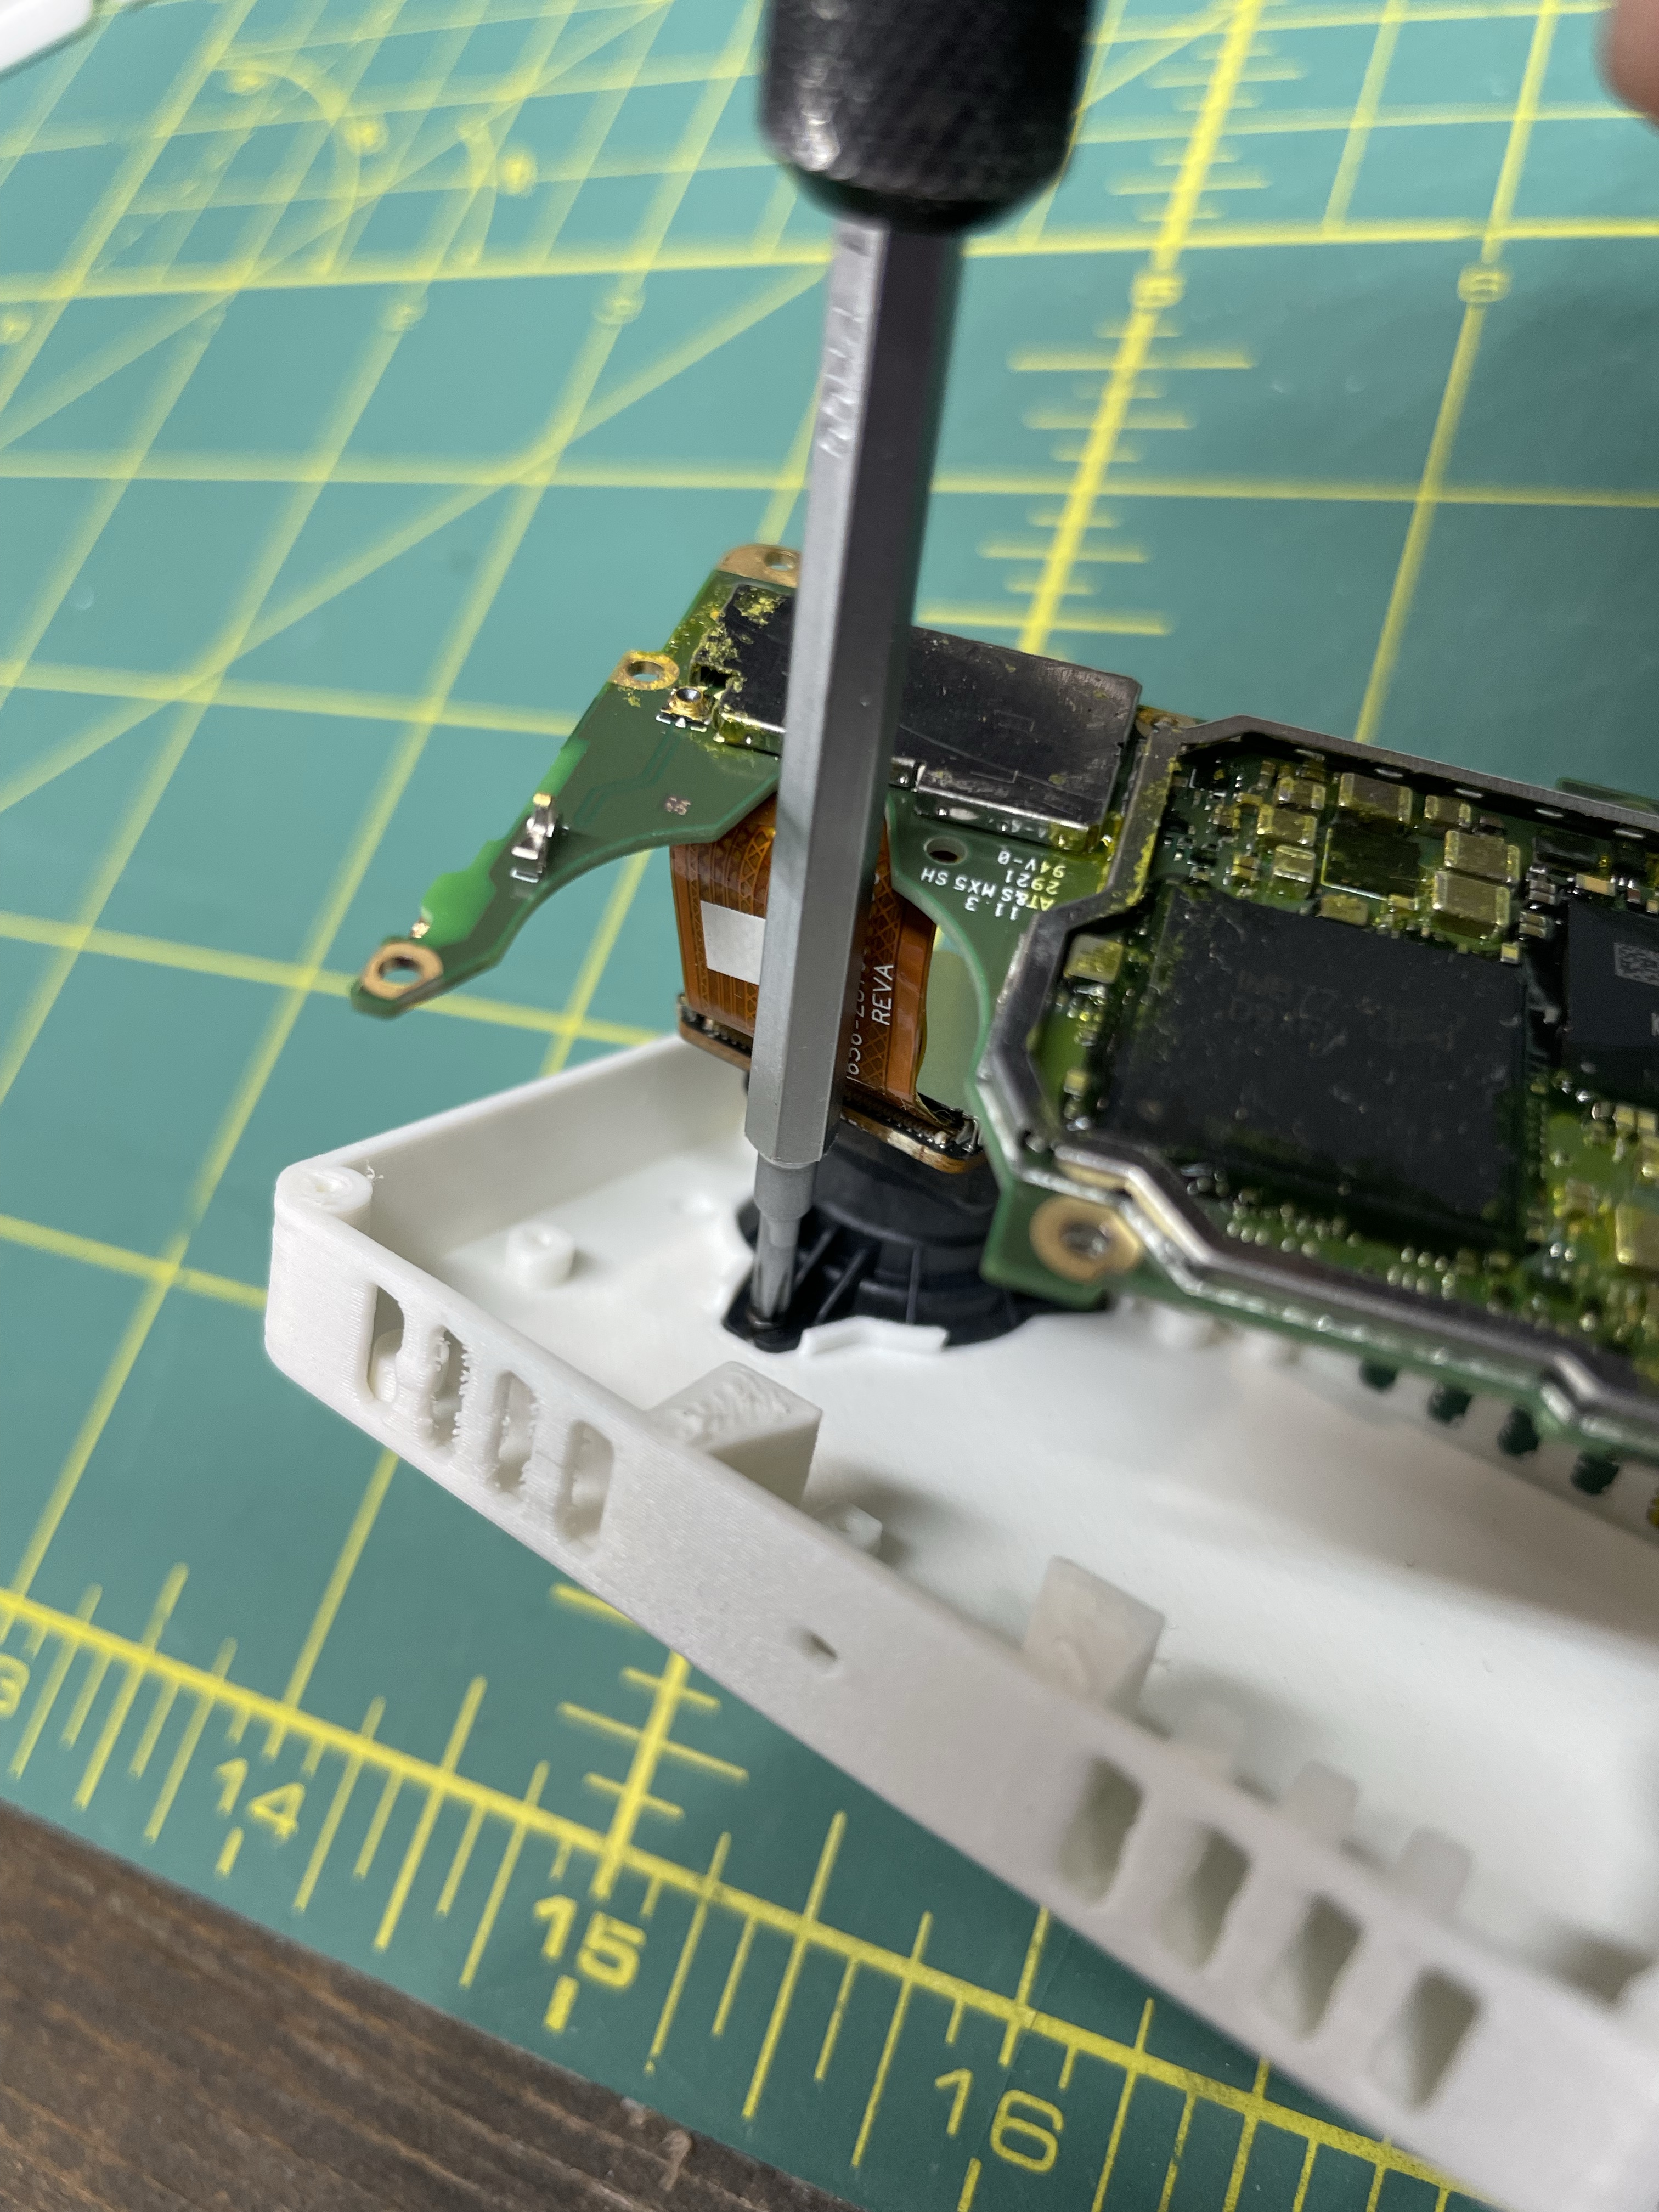

now it’s time to install the camera to frame mount.
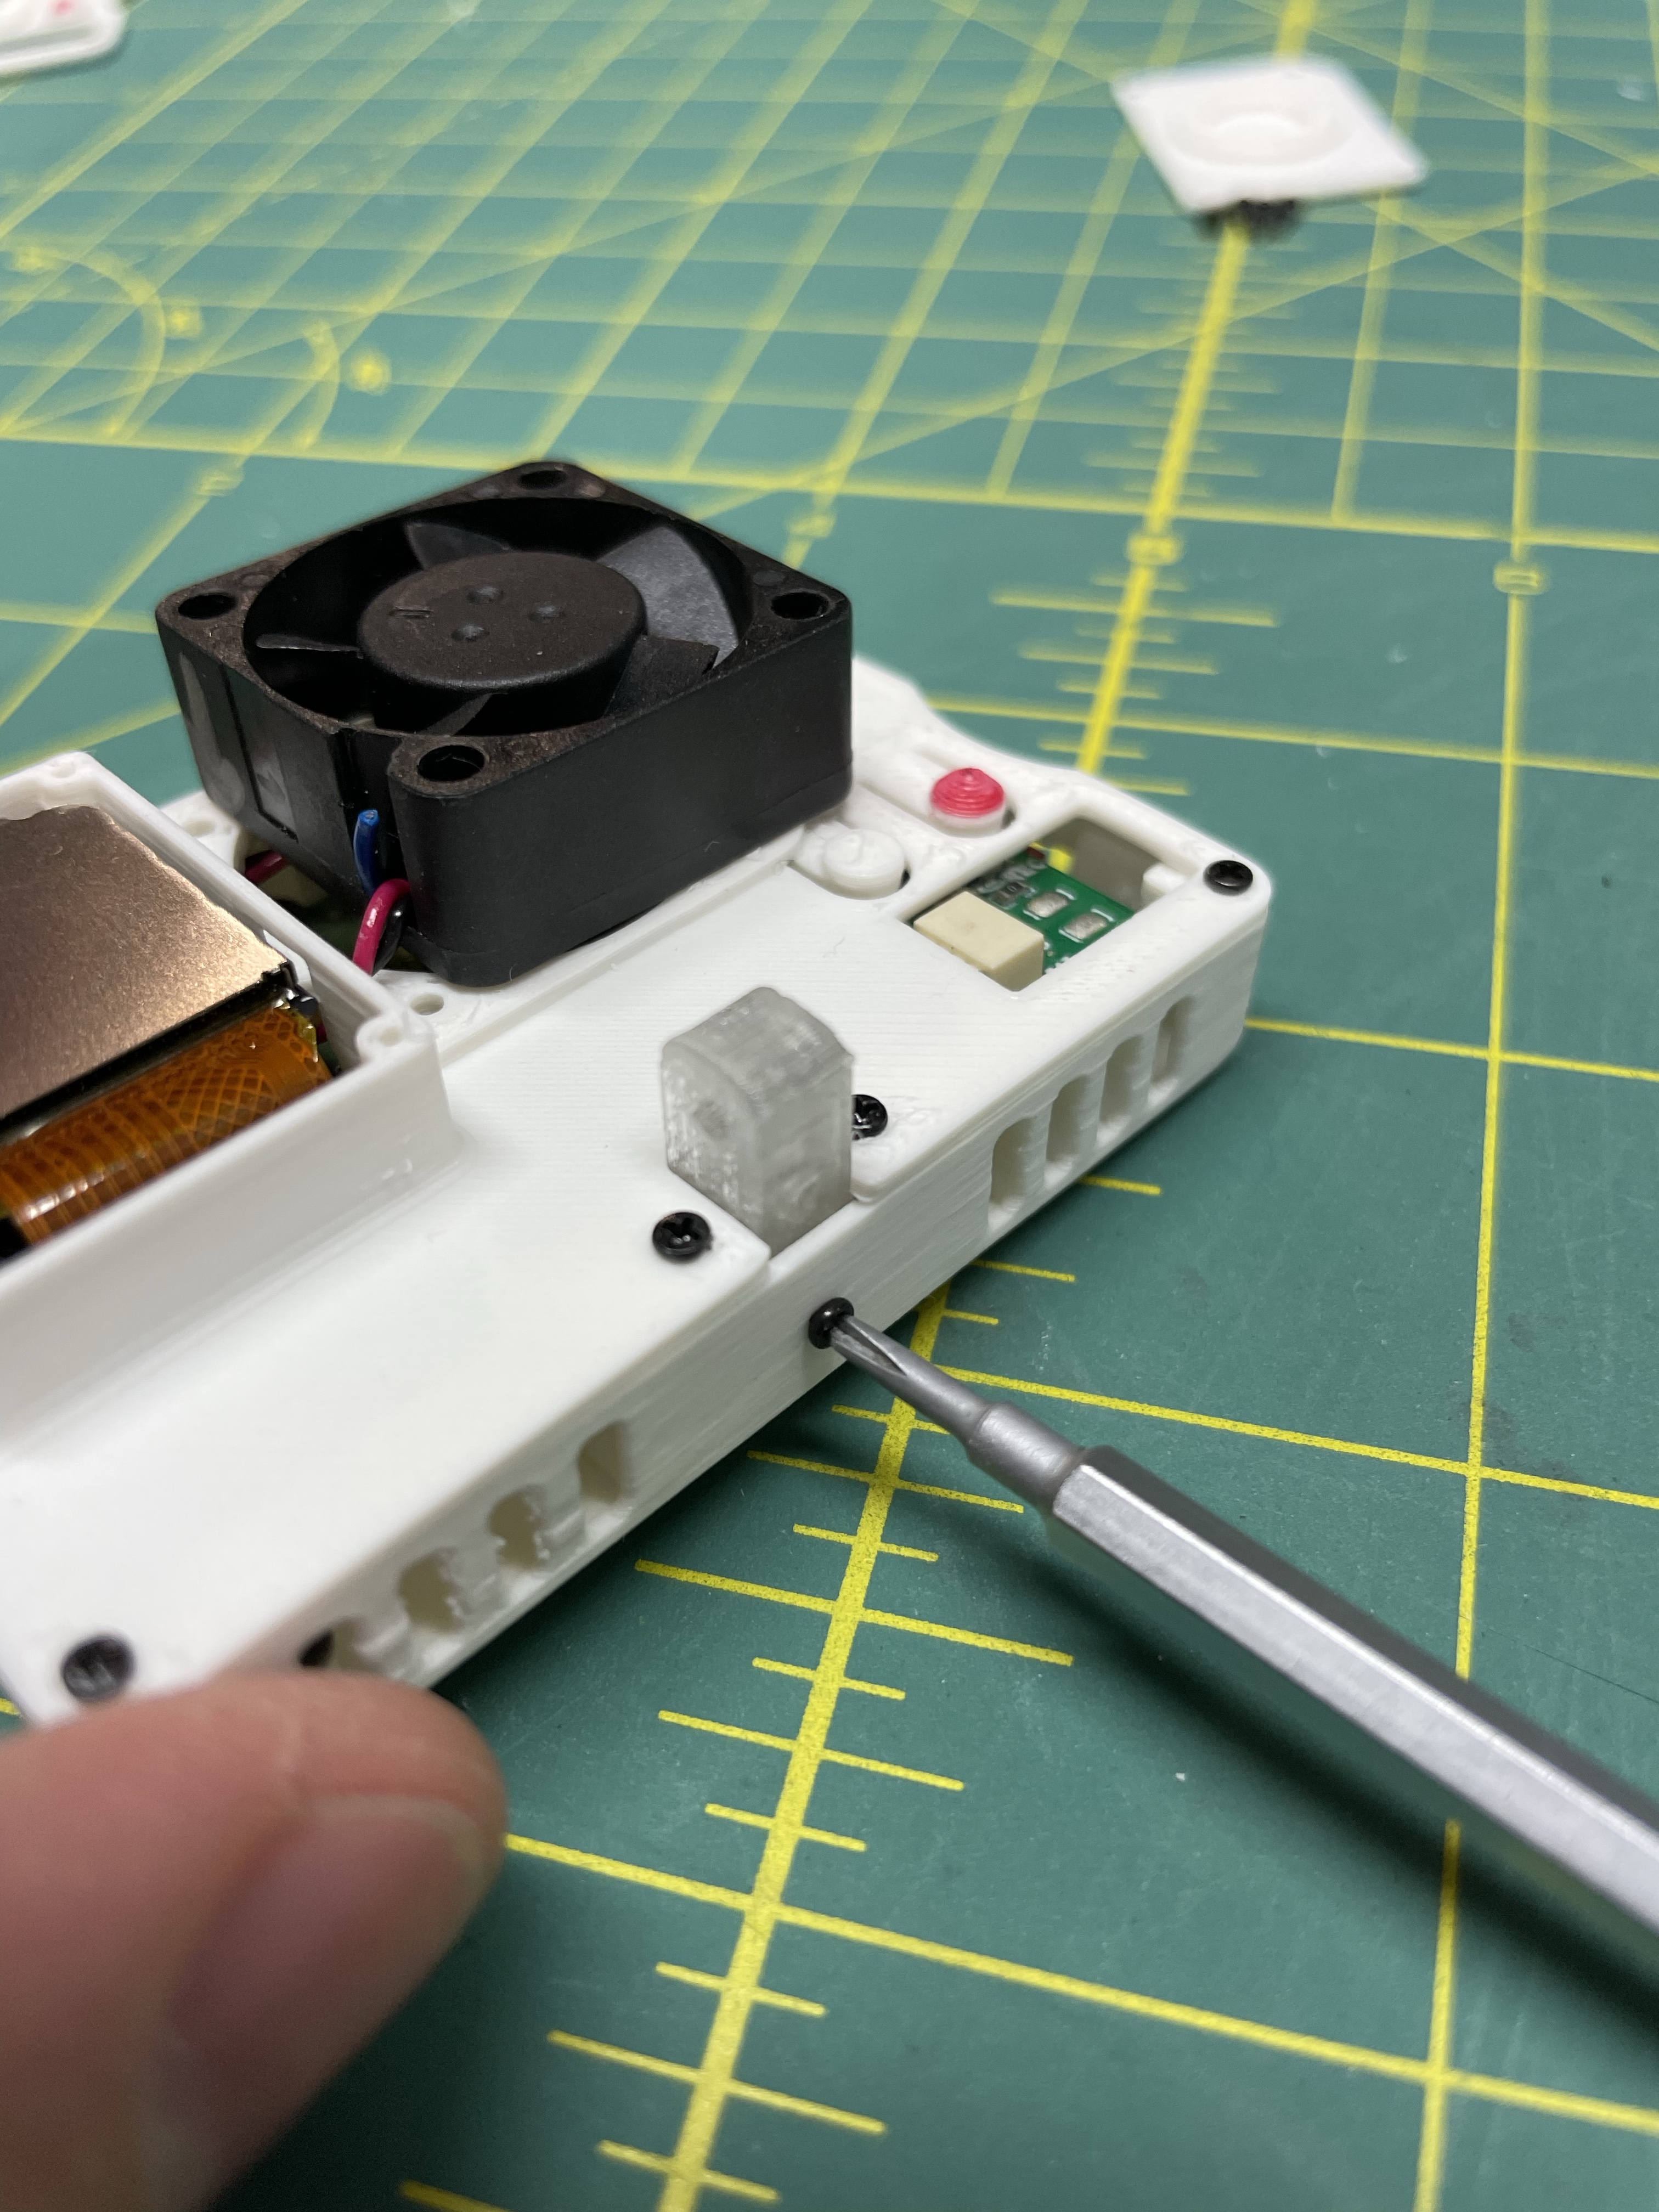
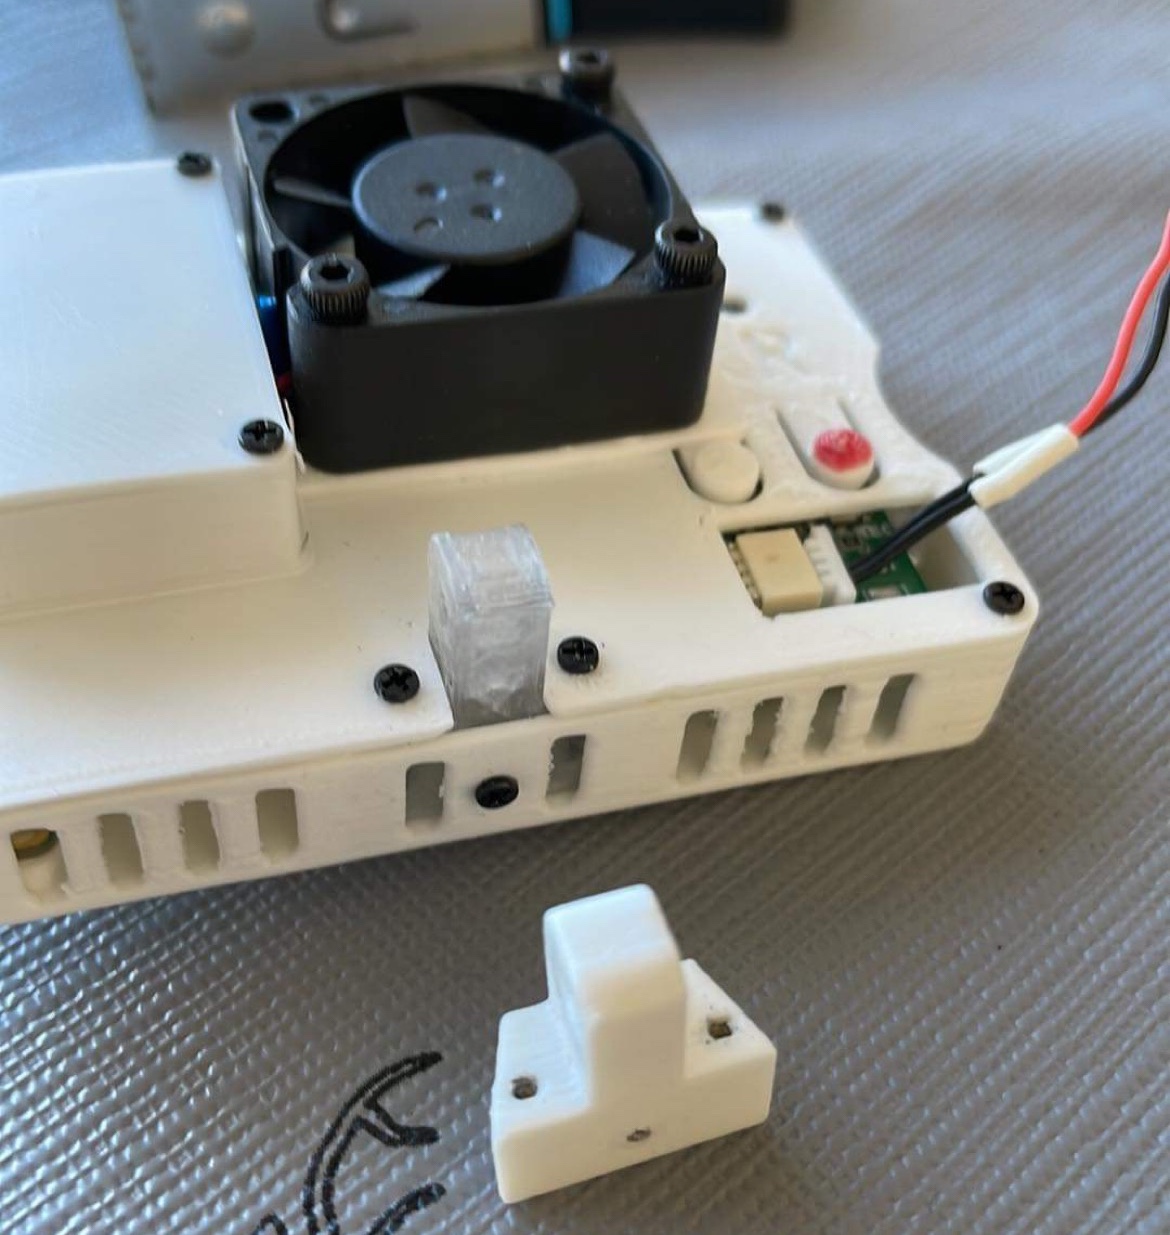
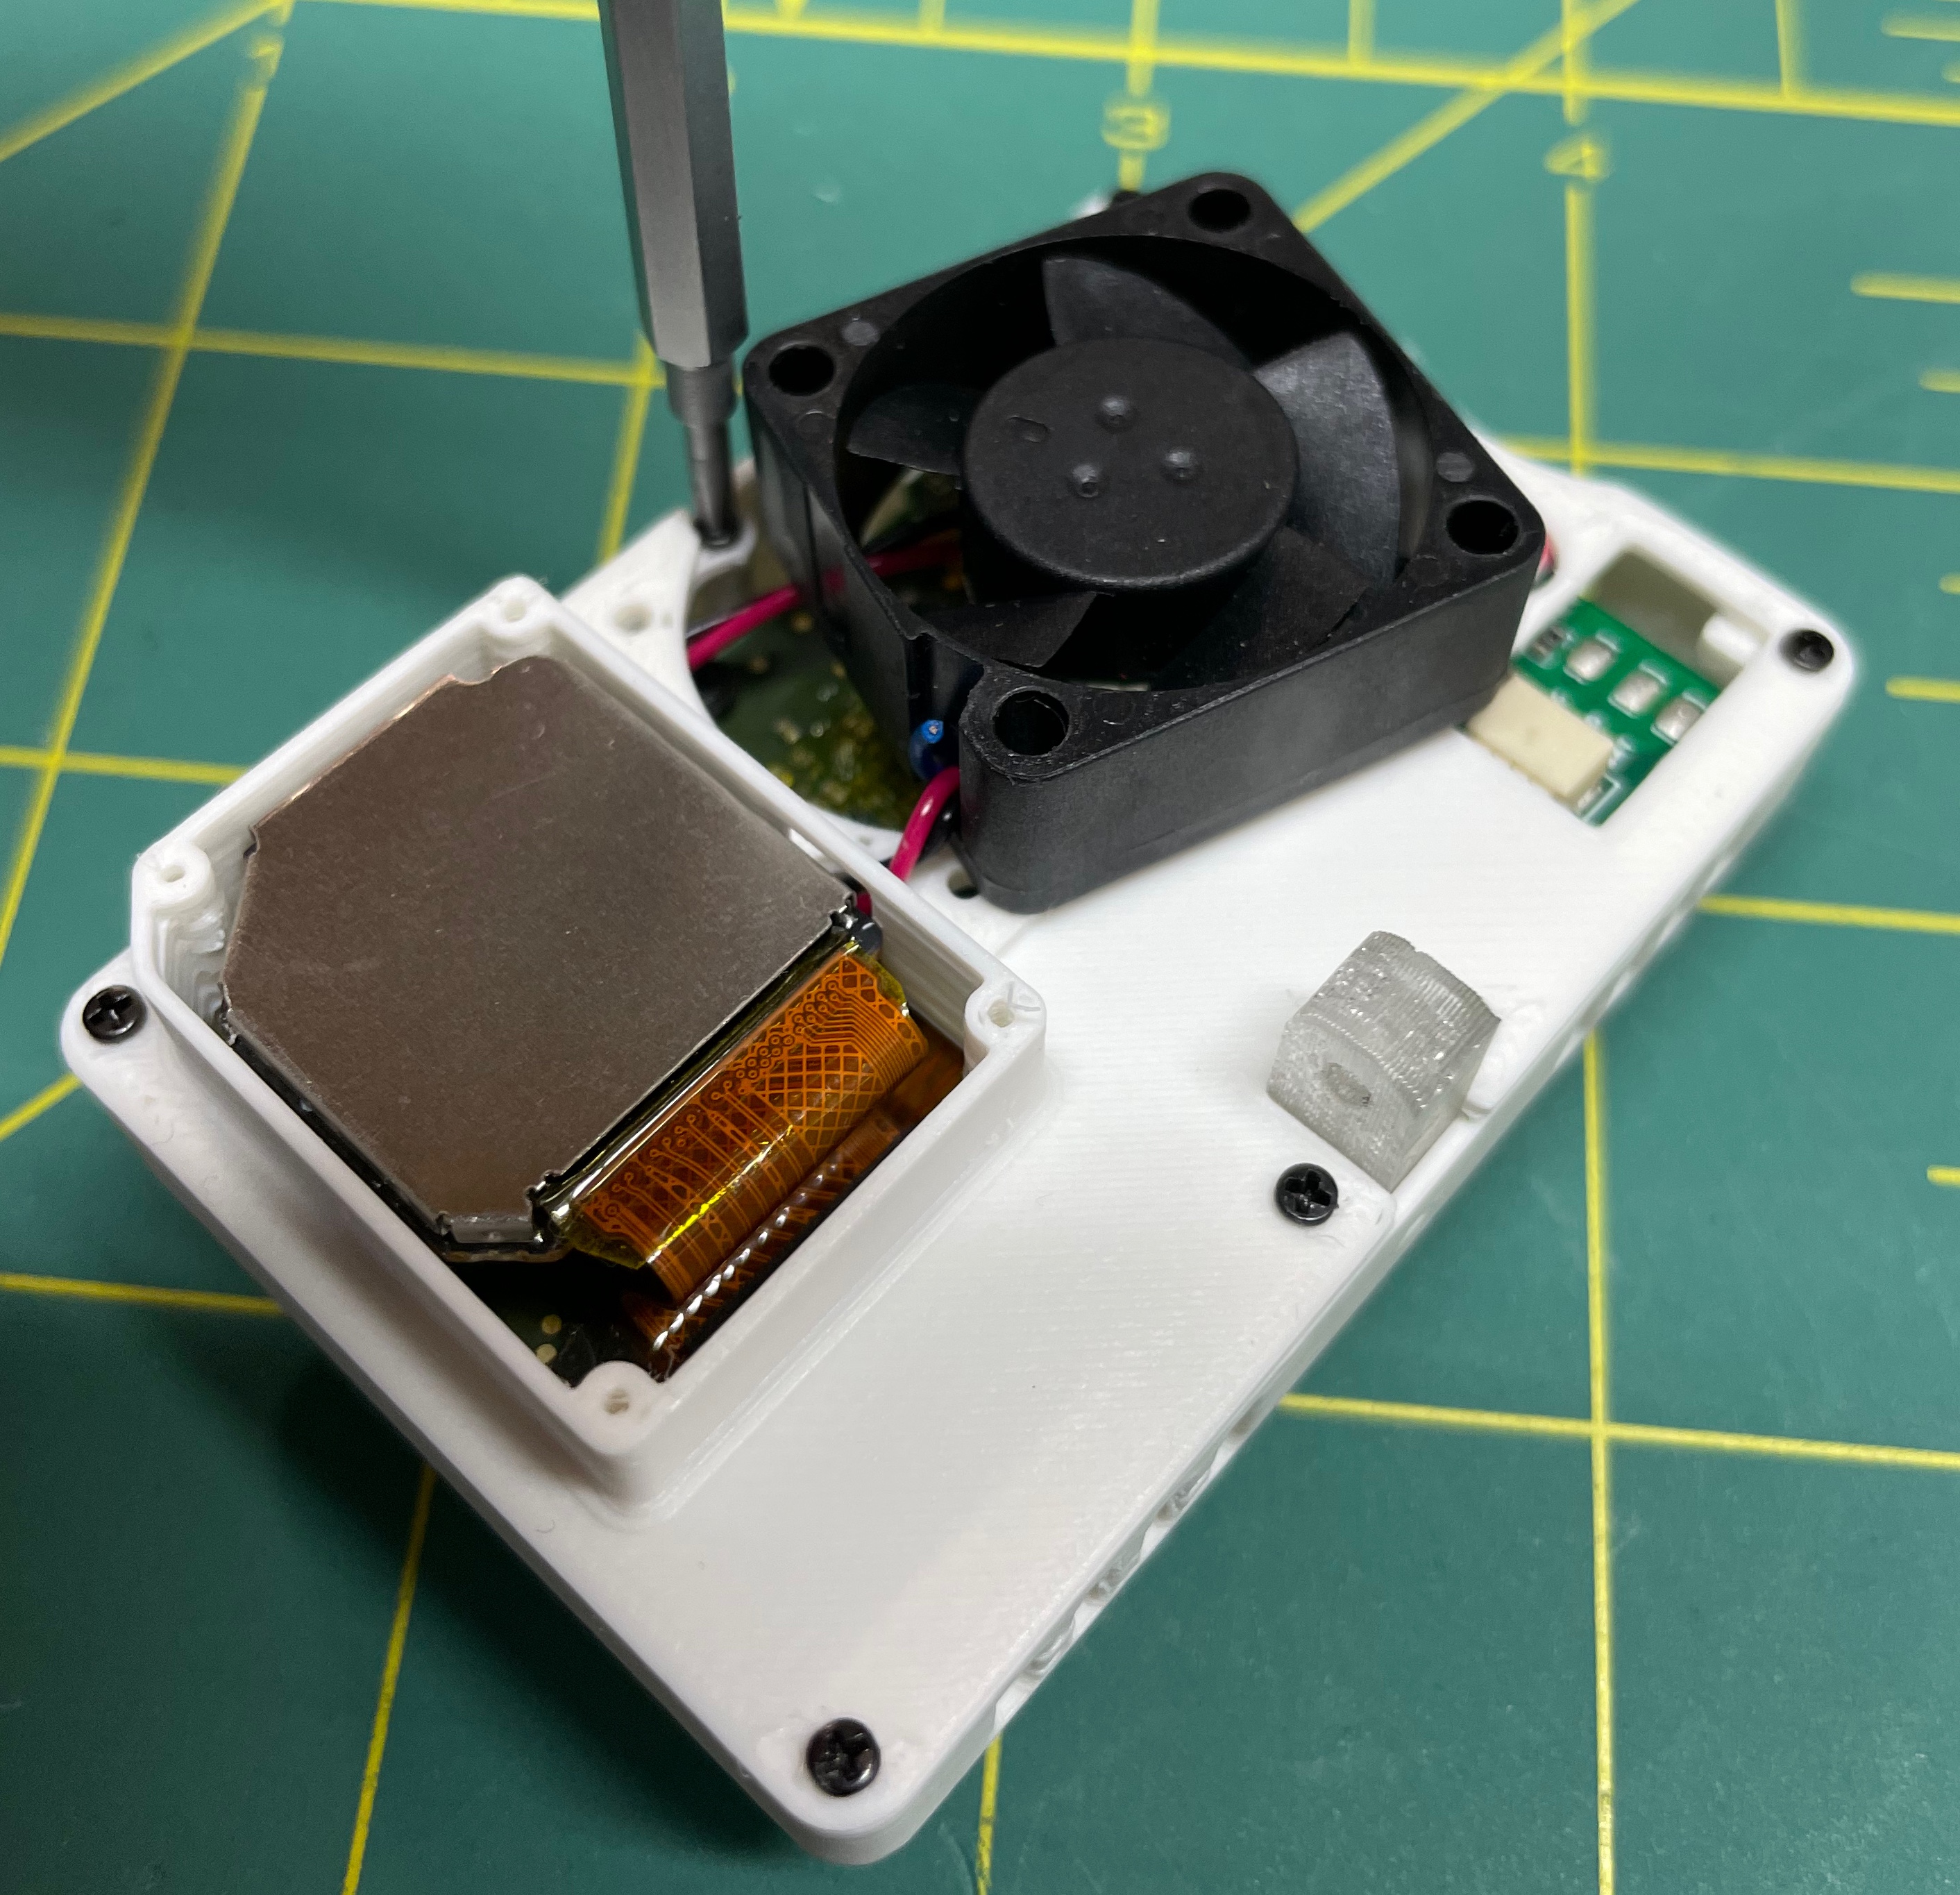
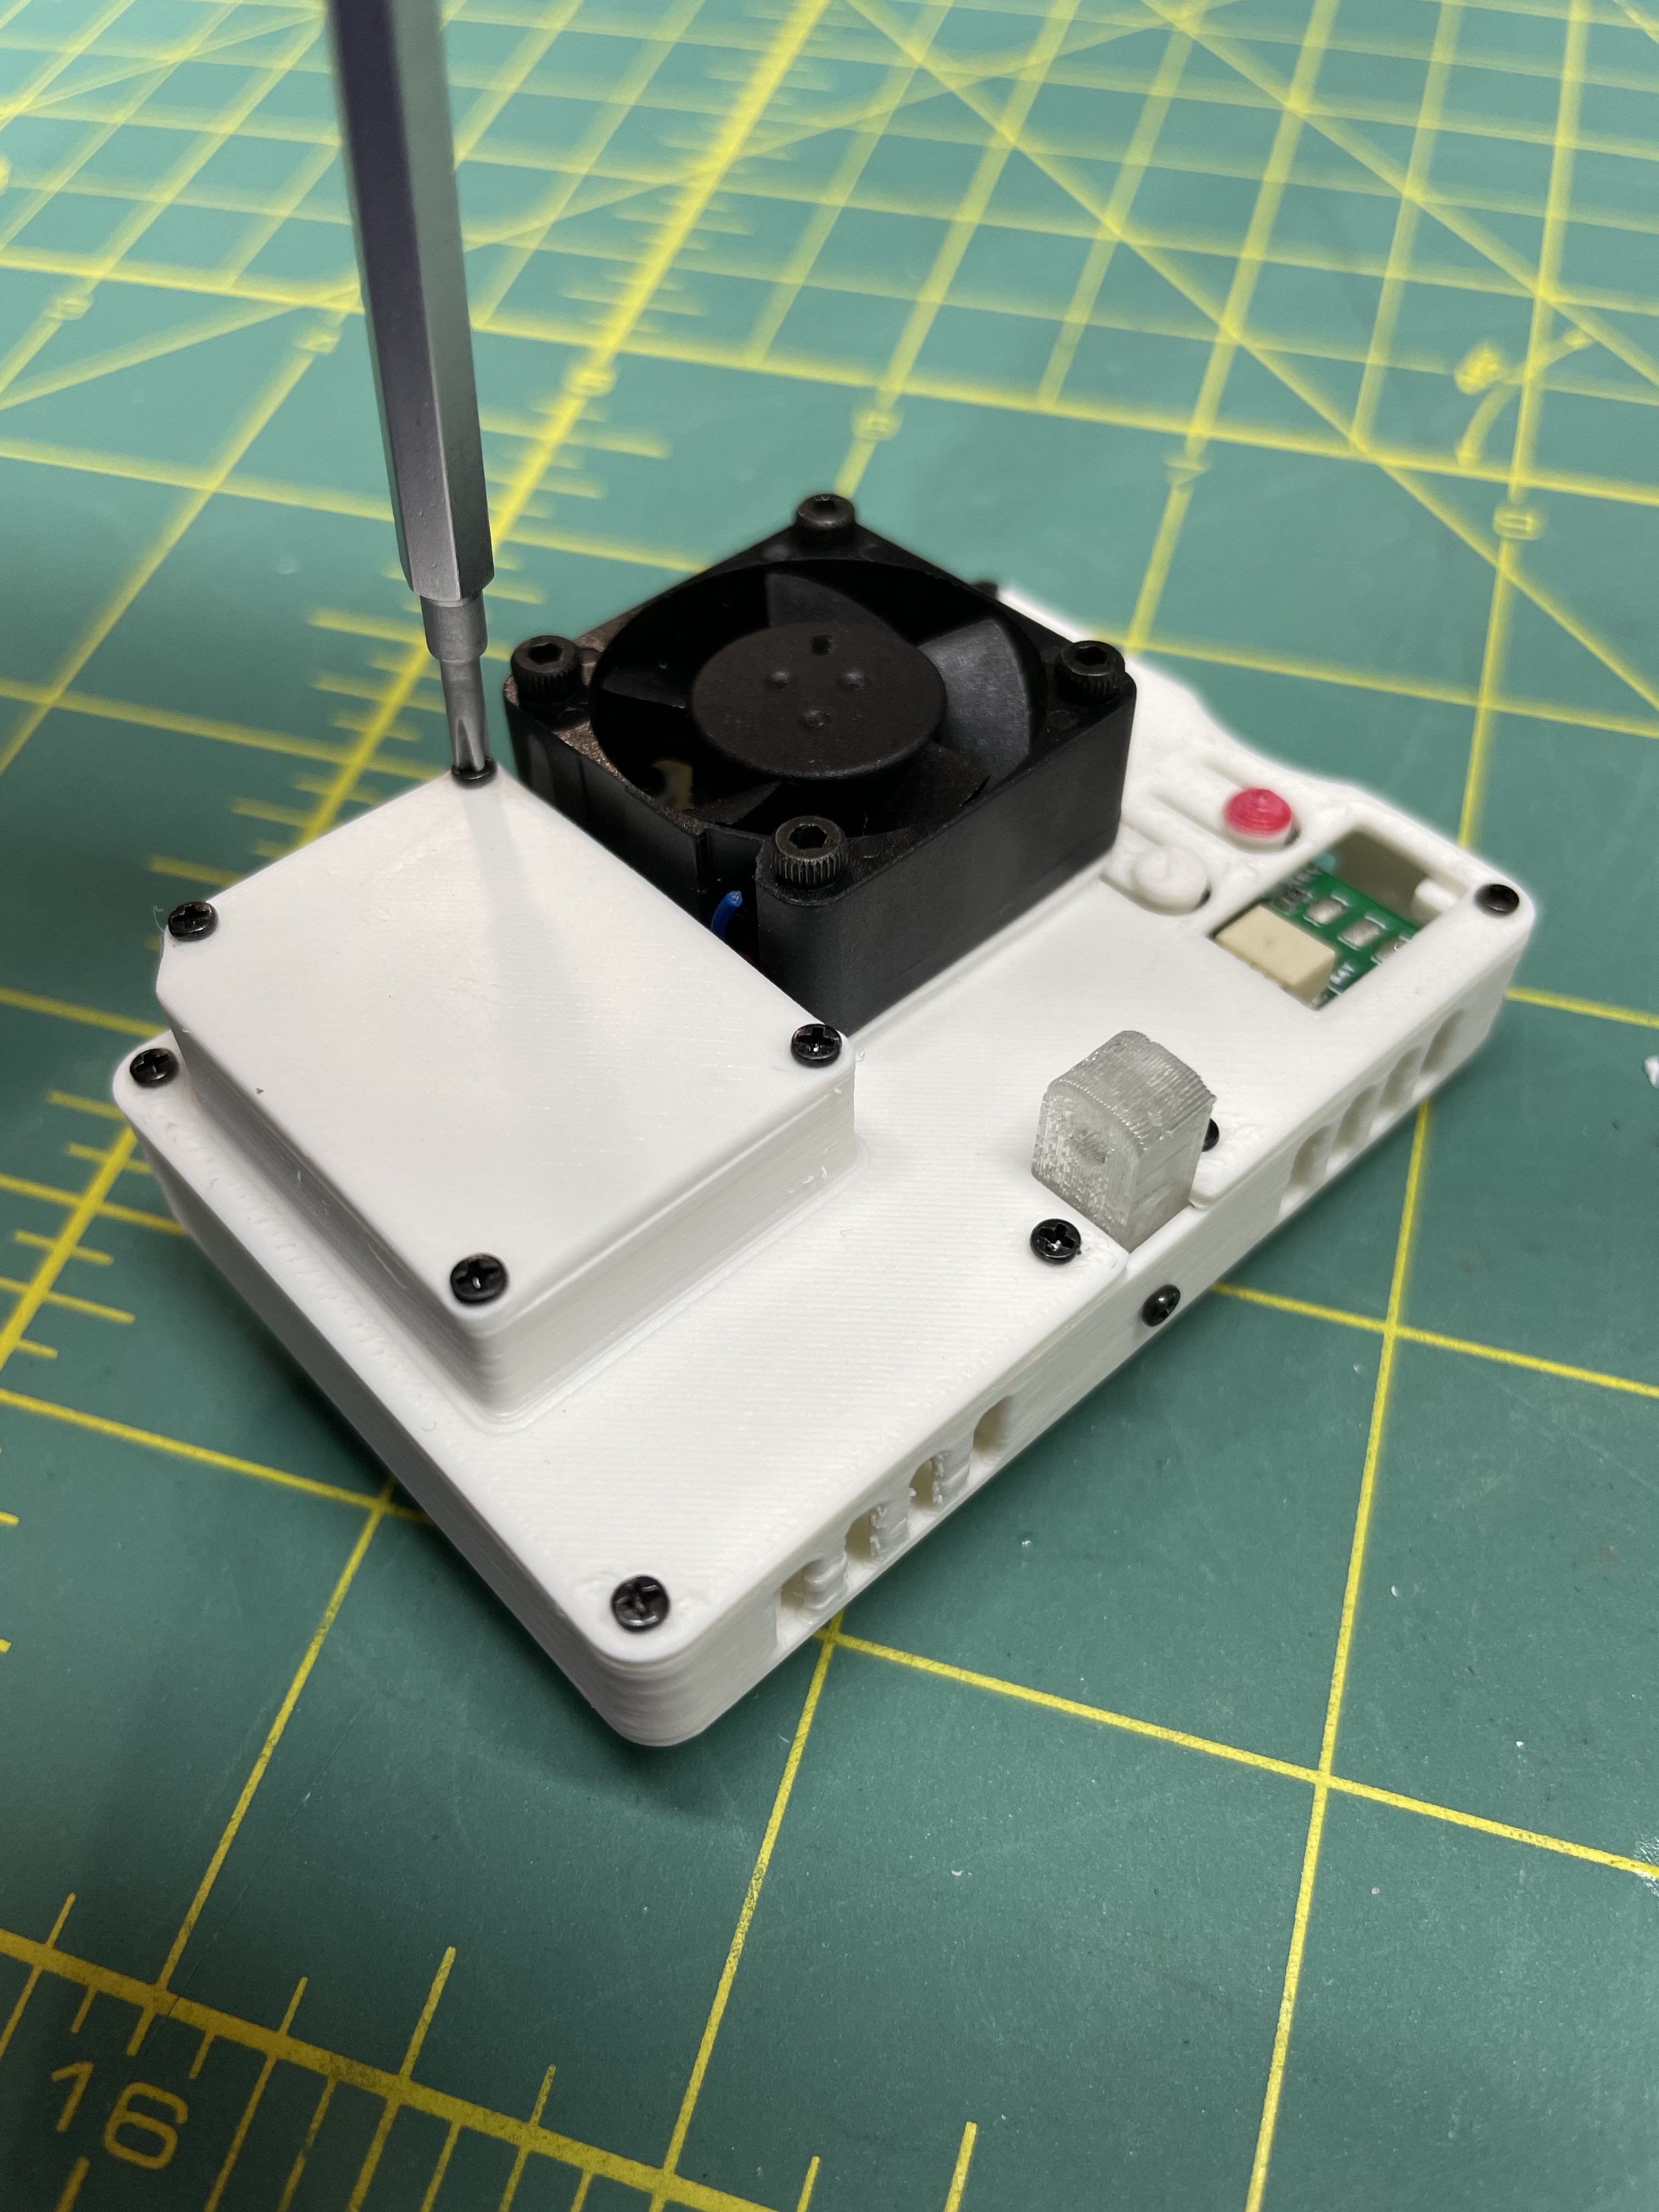
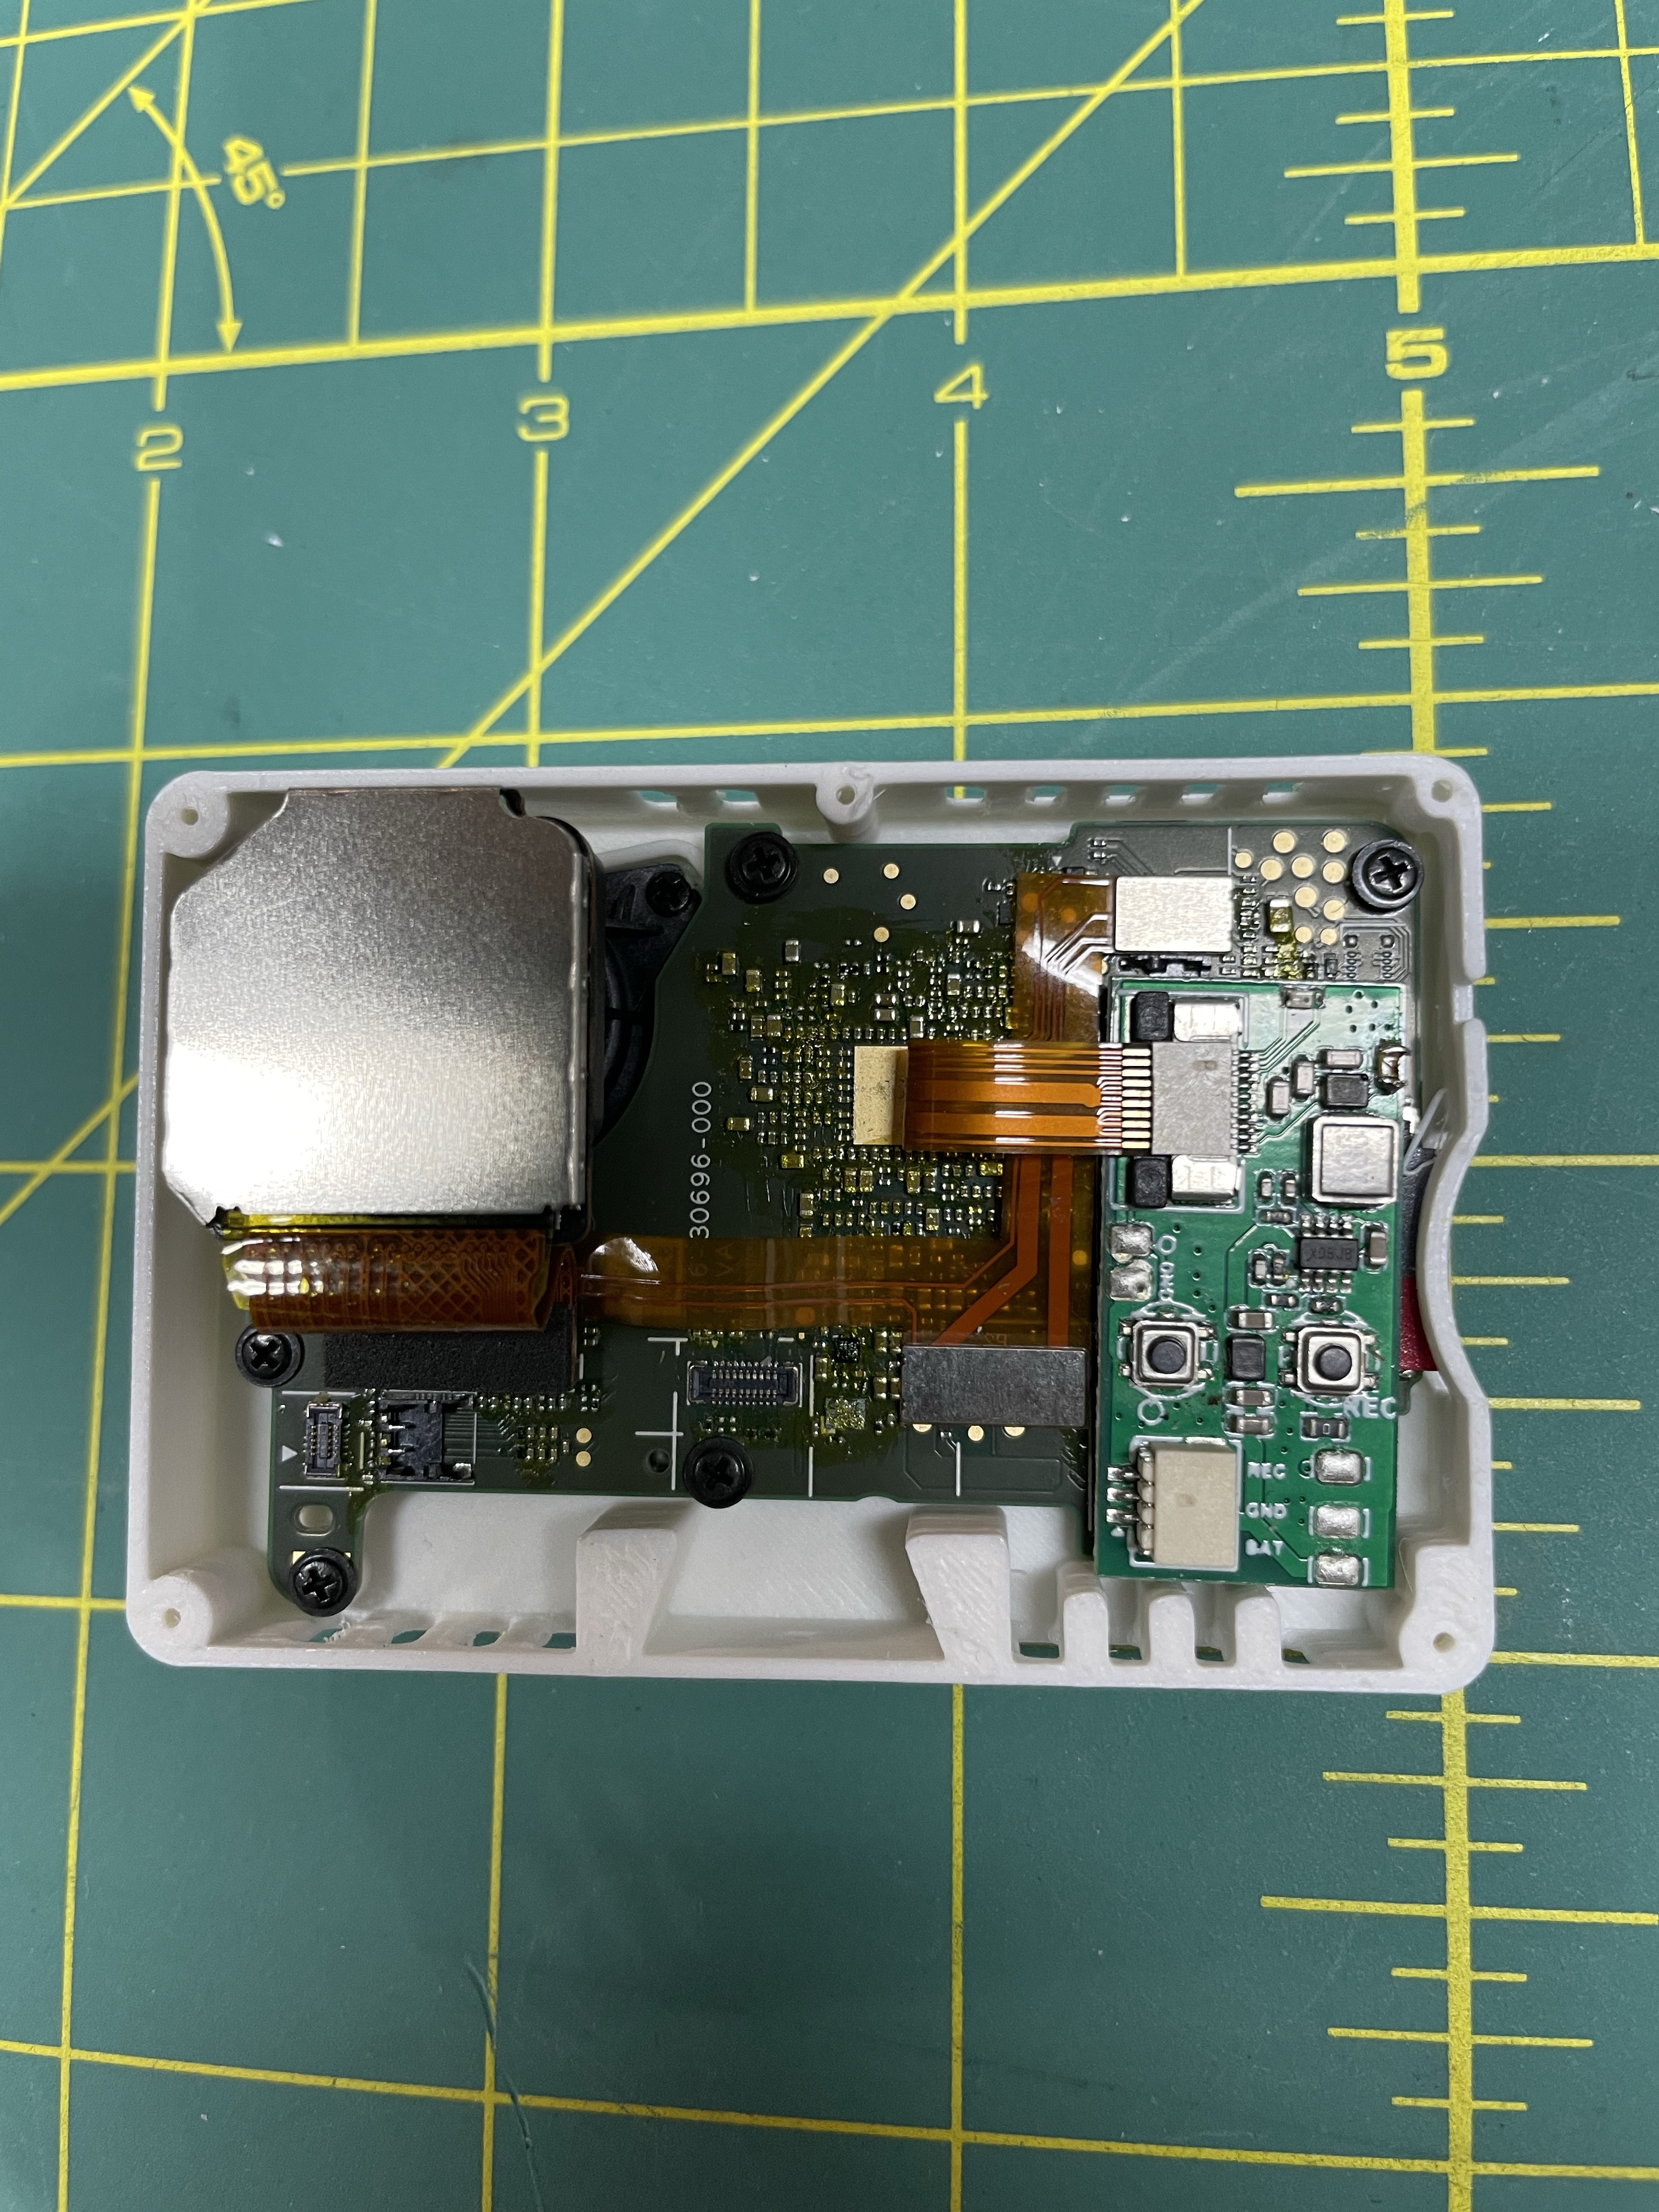
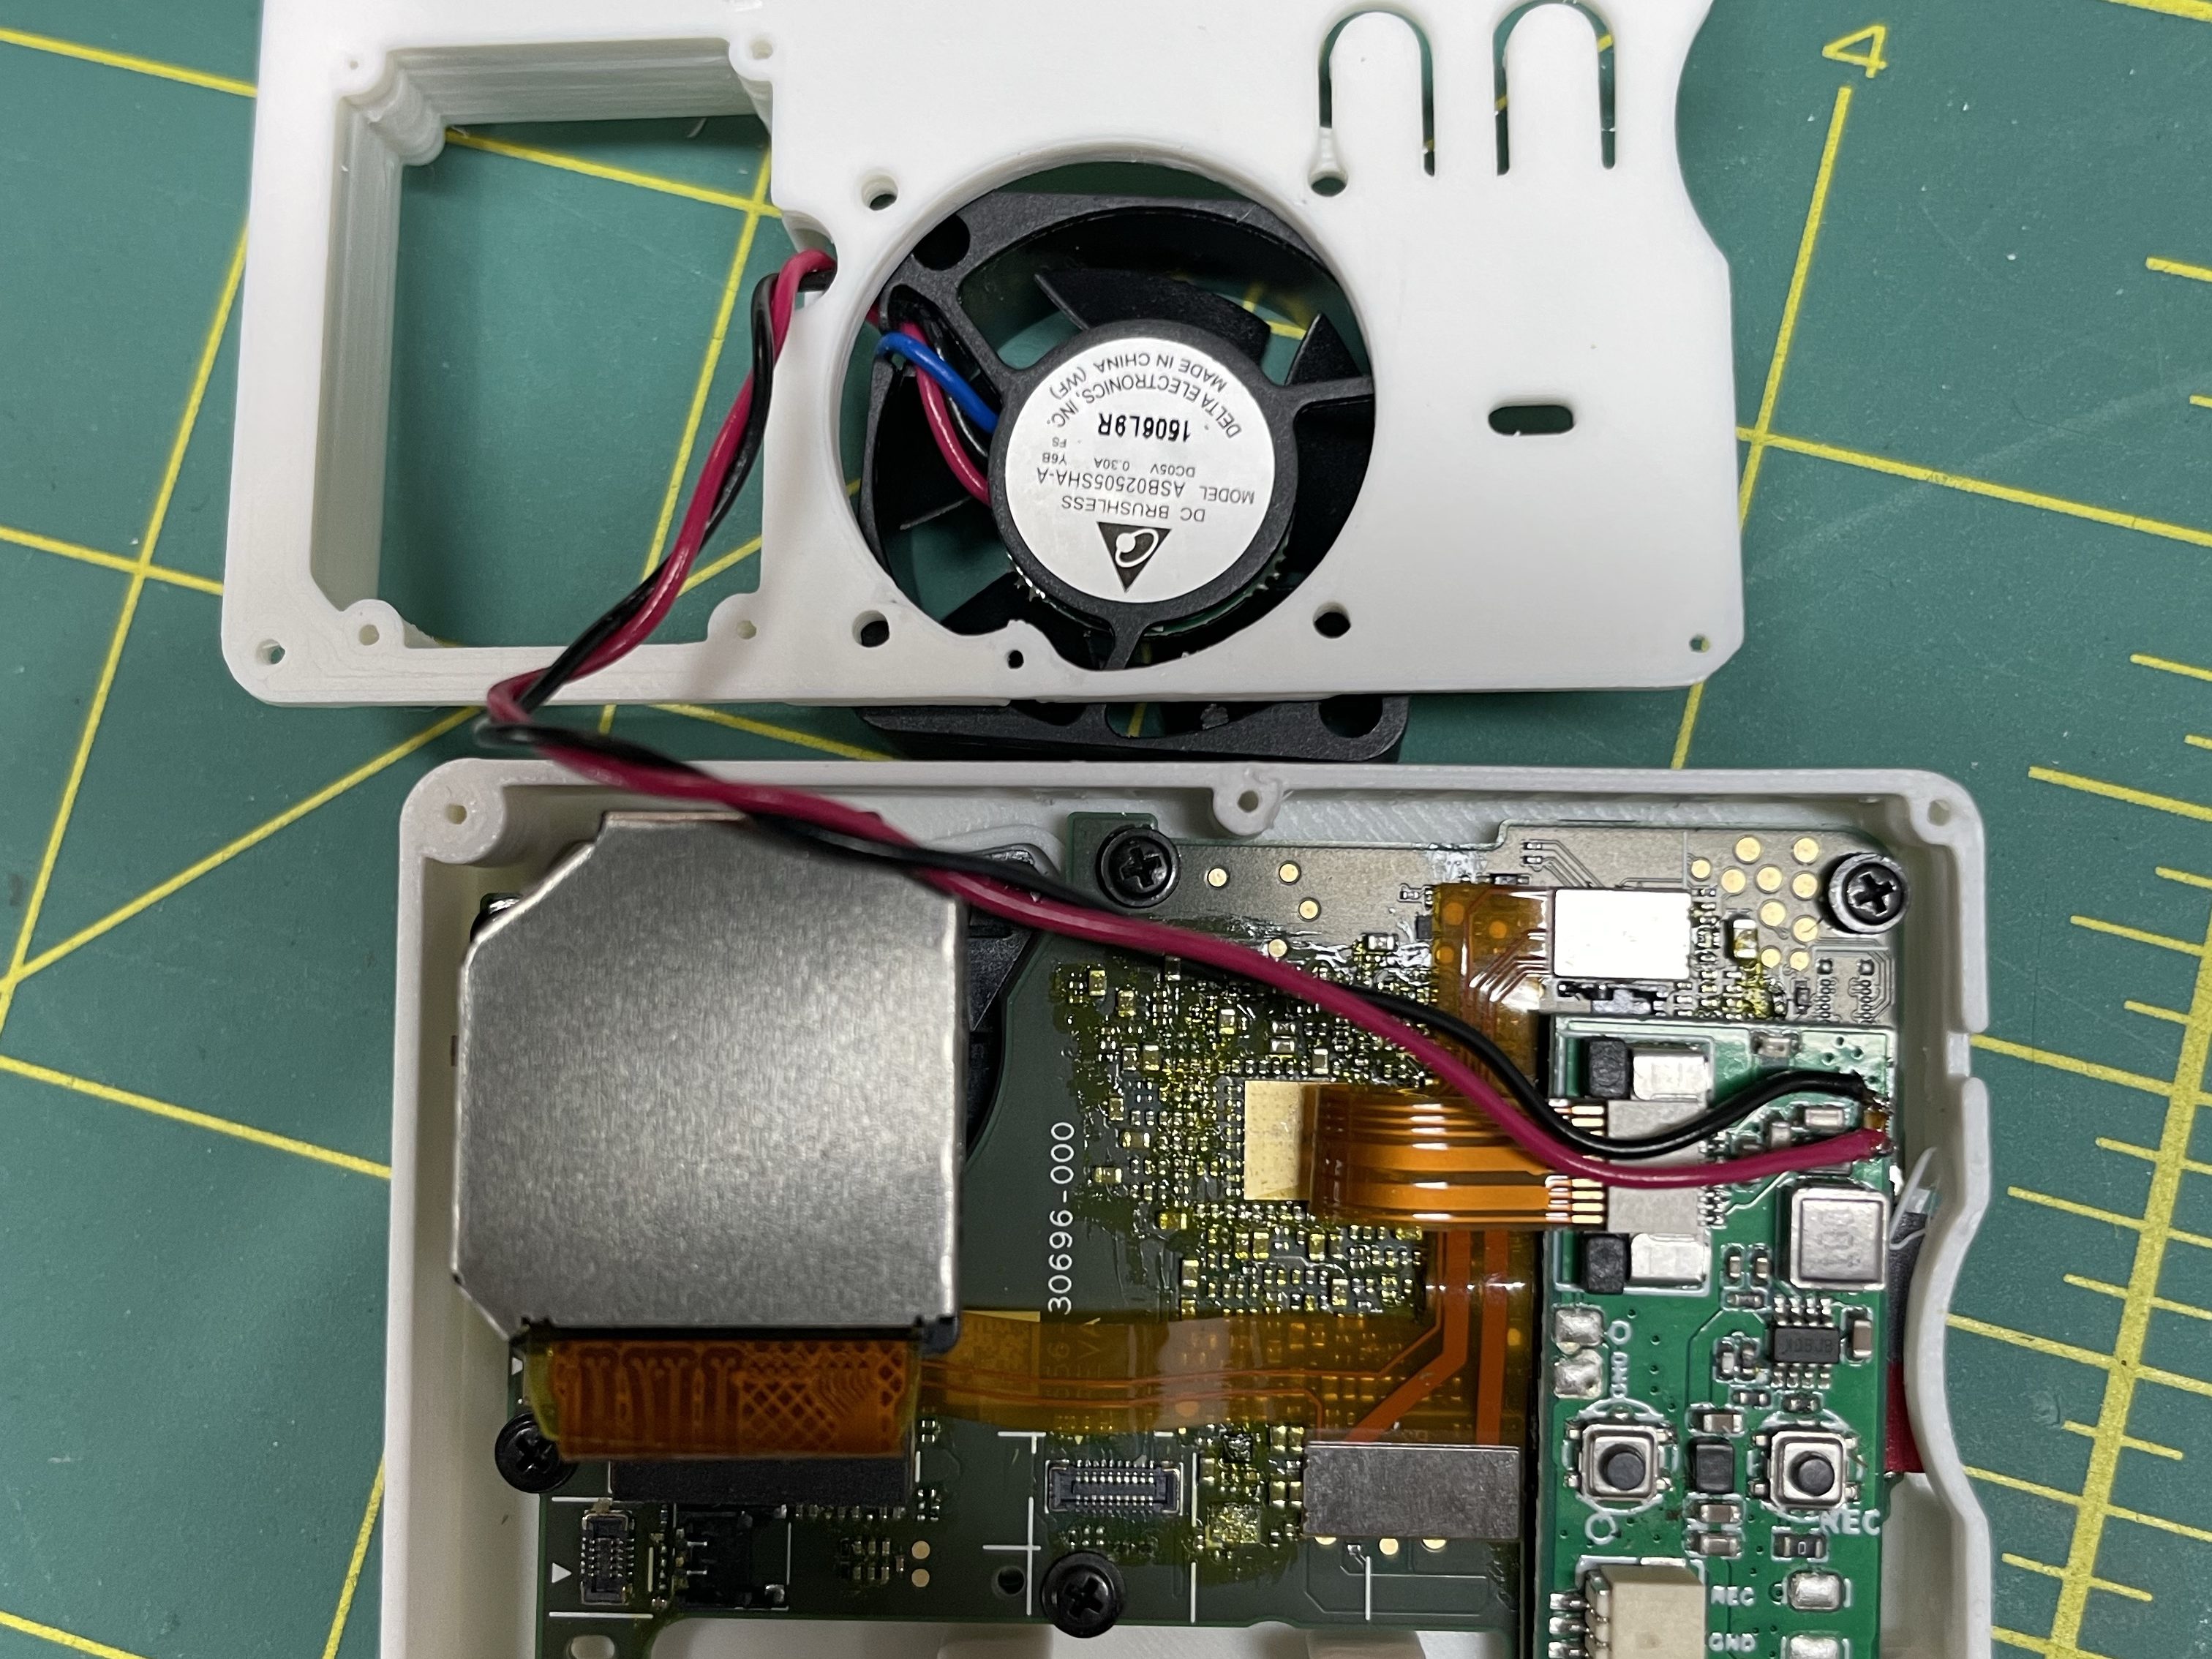
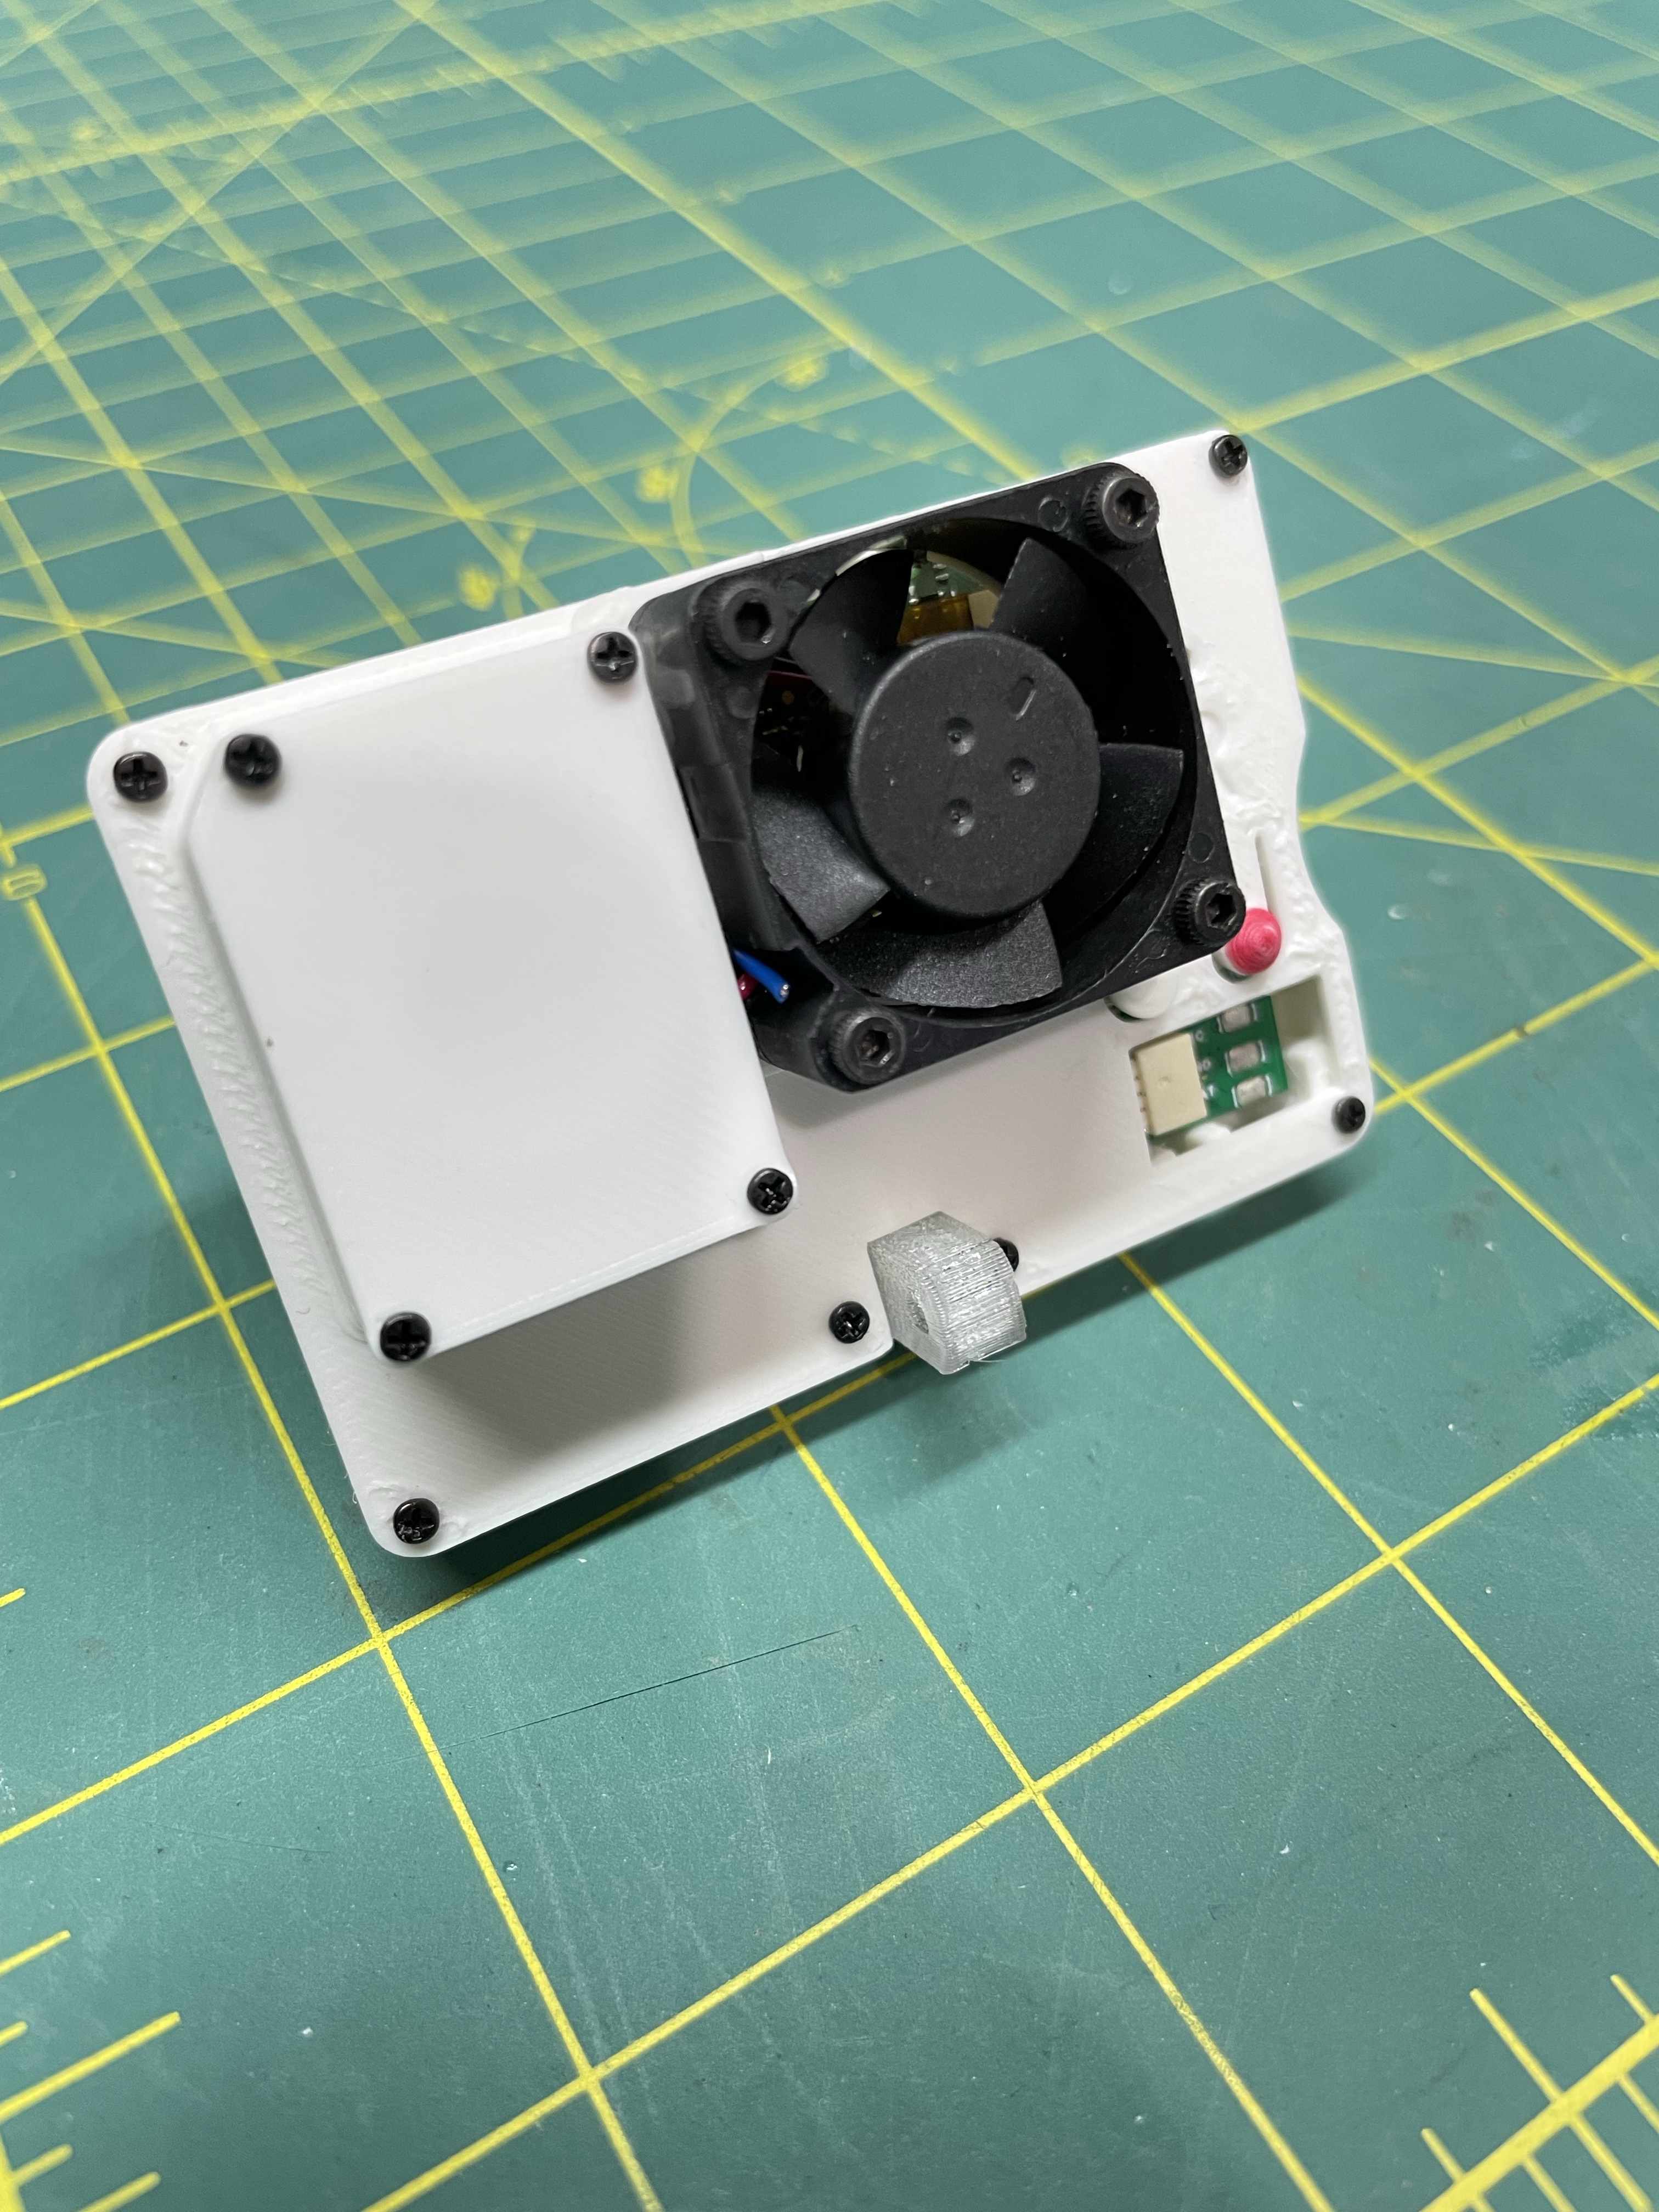
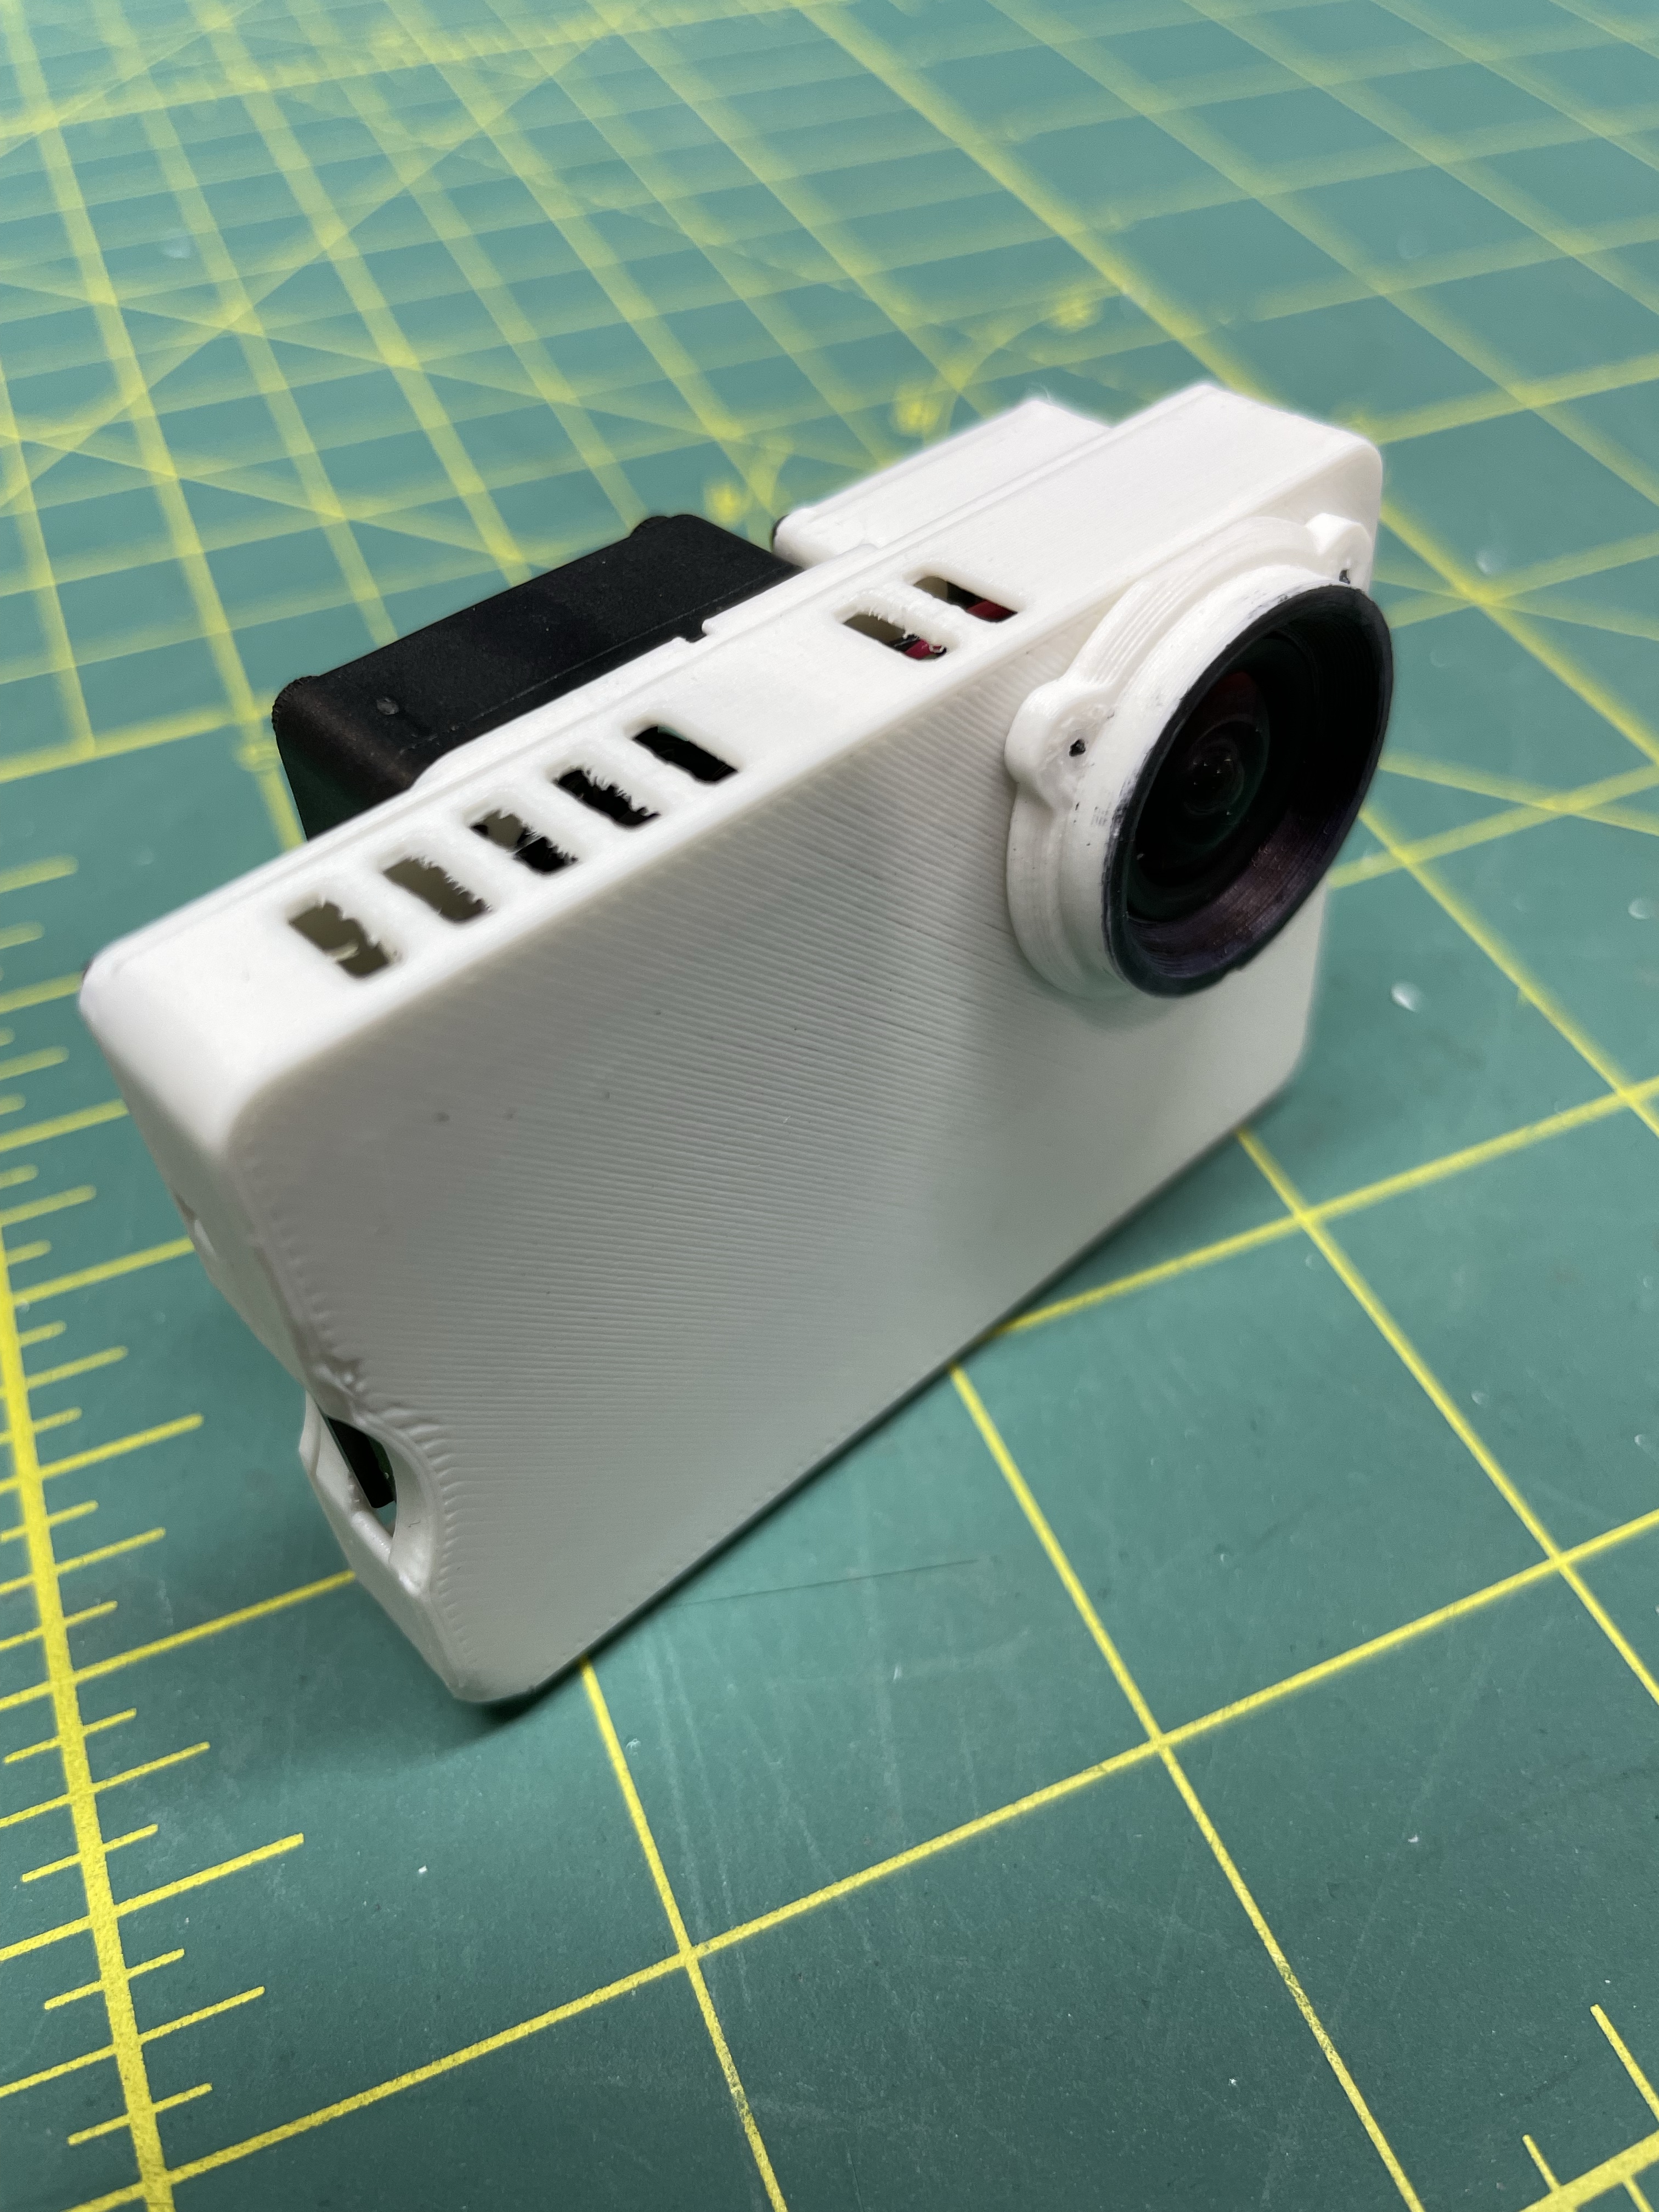
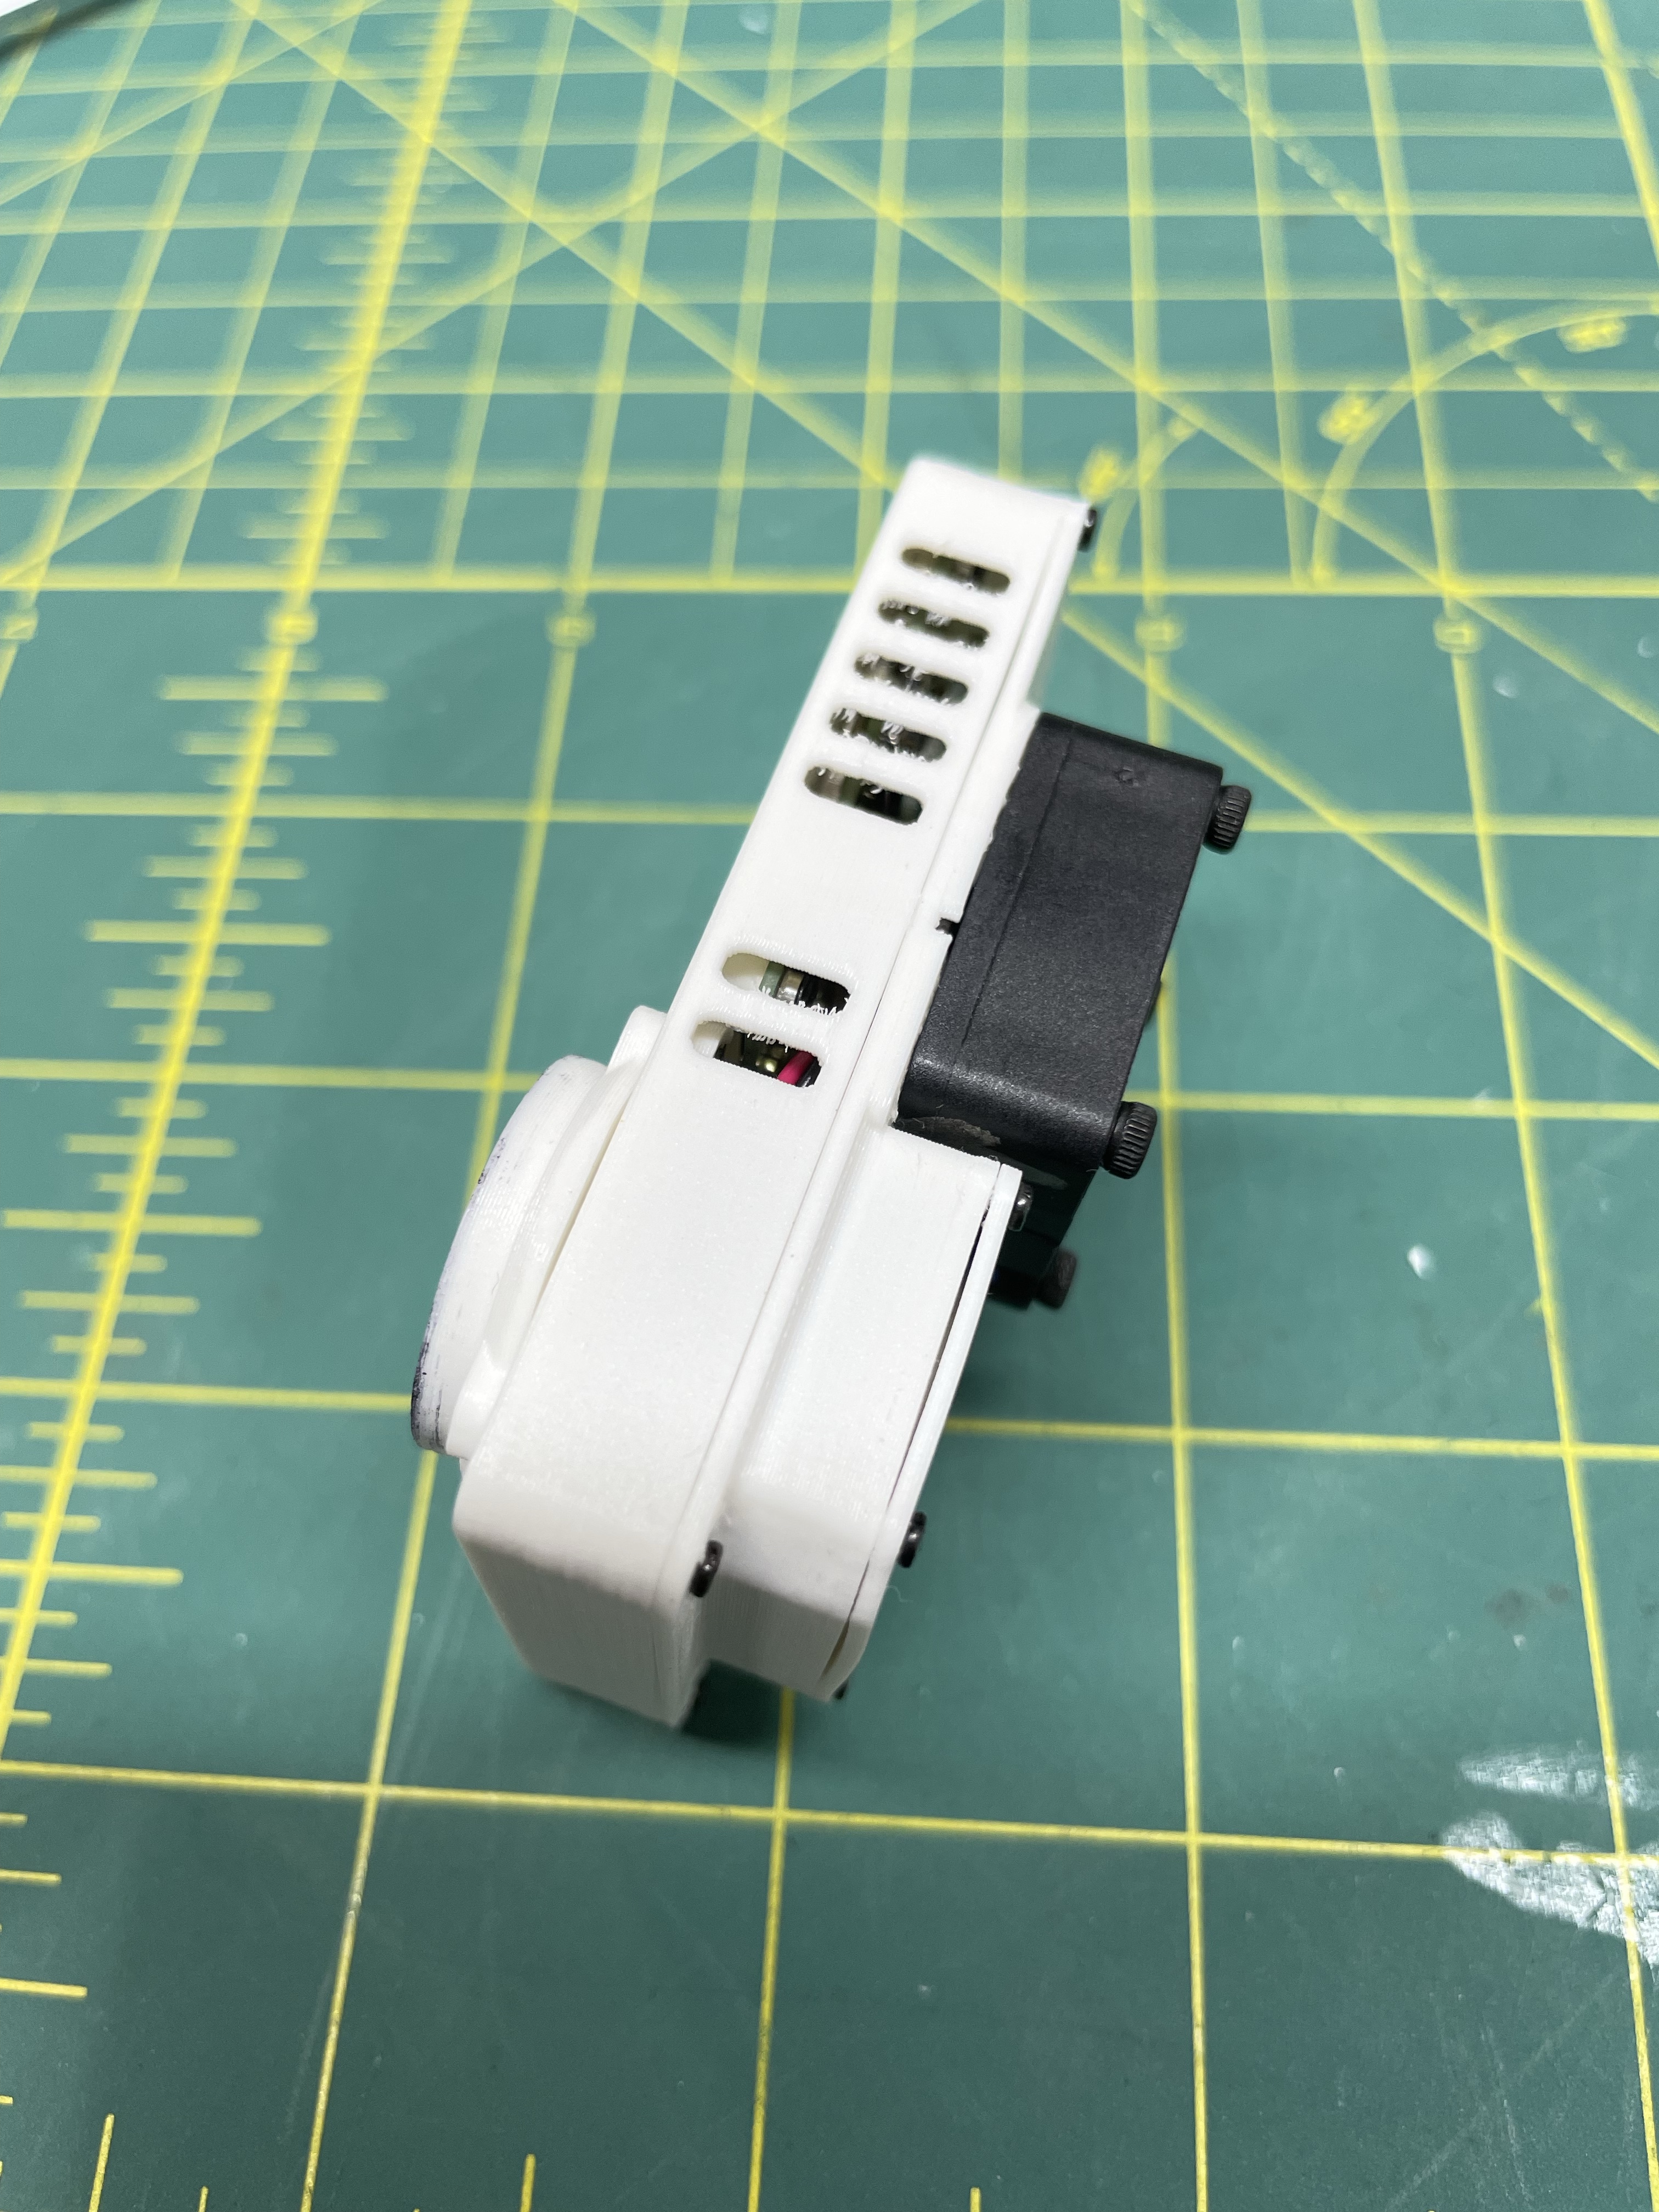
Here are some pictures of the final assembly.
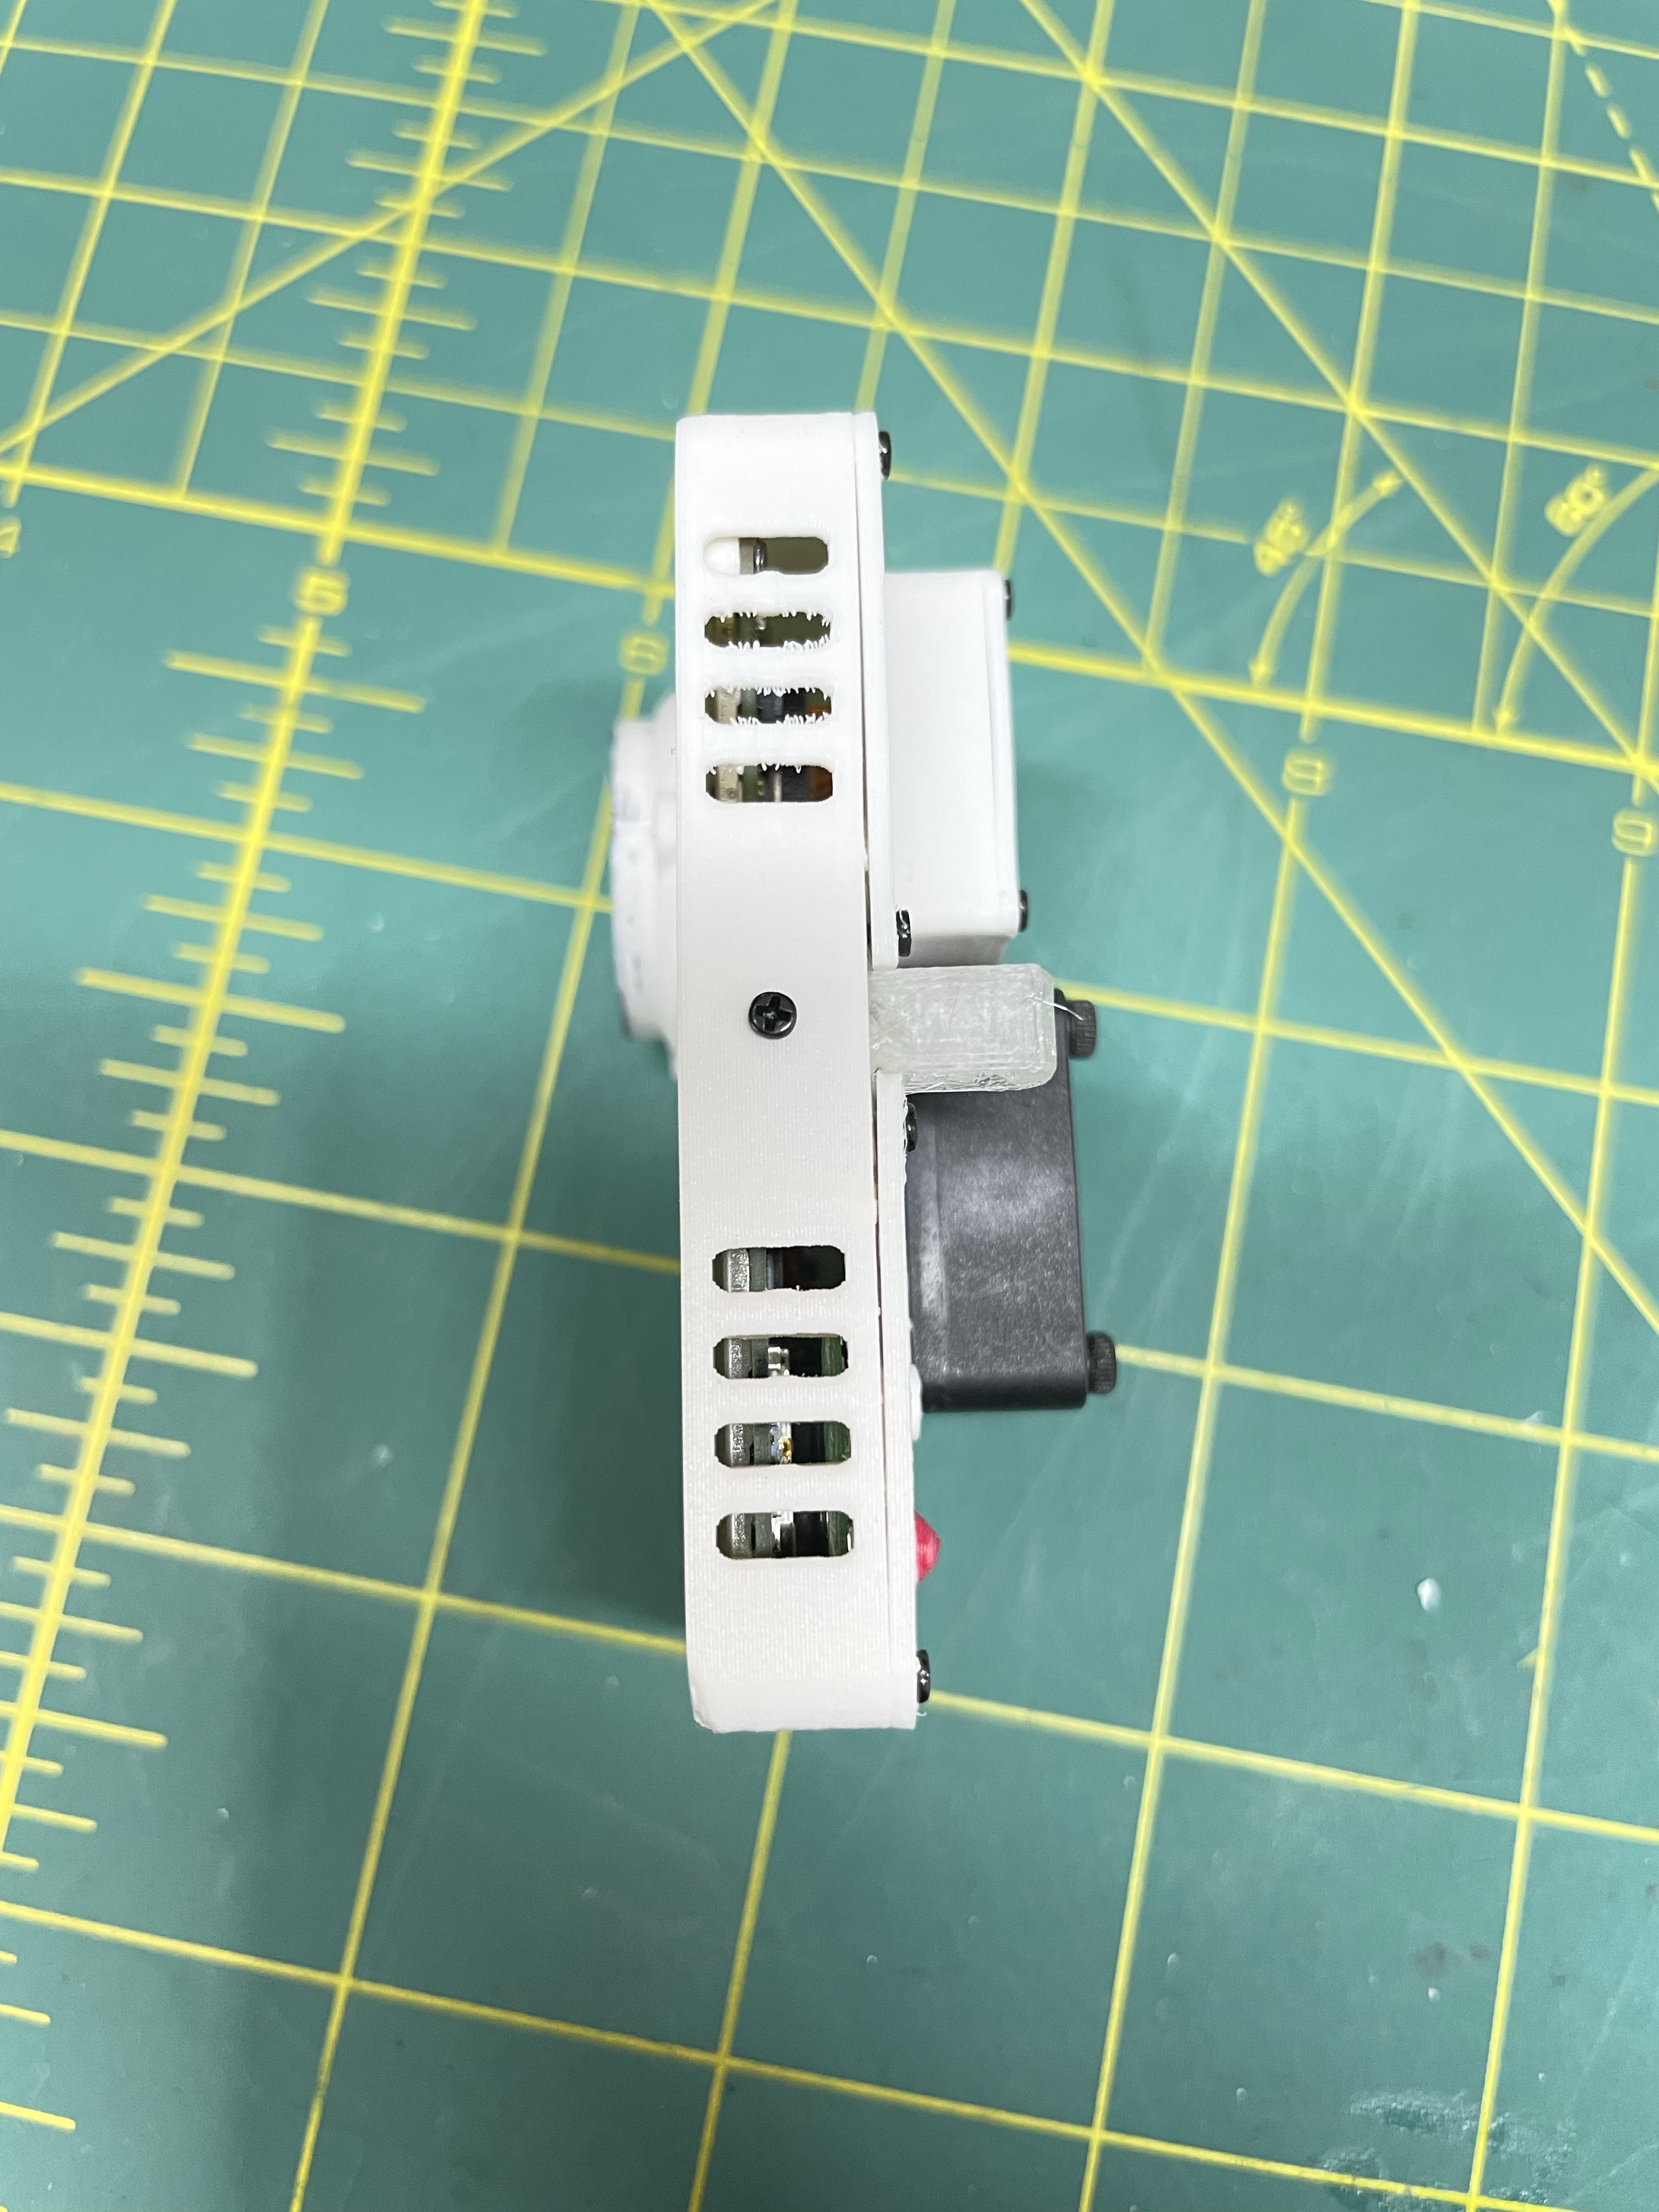
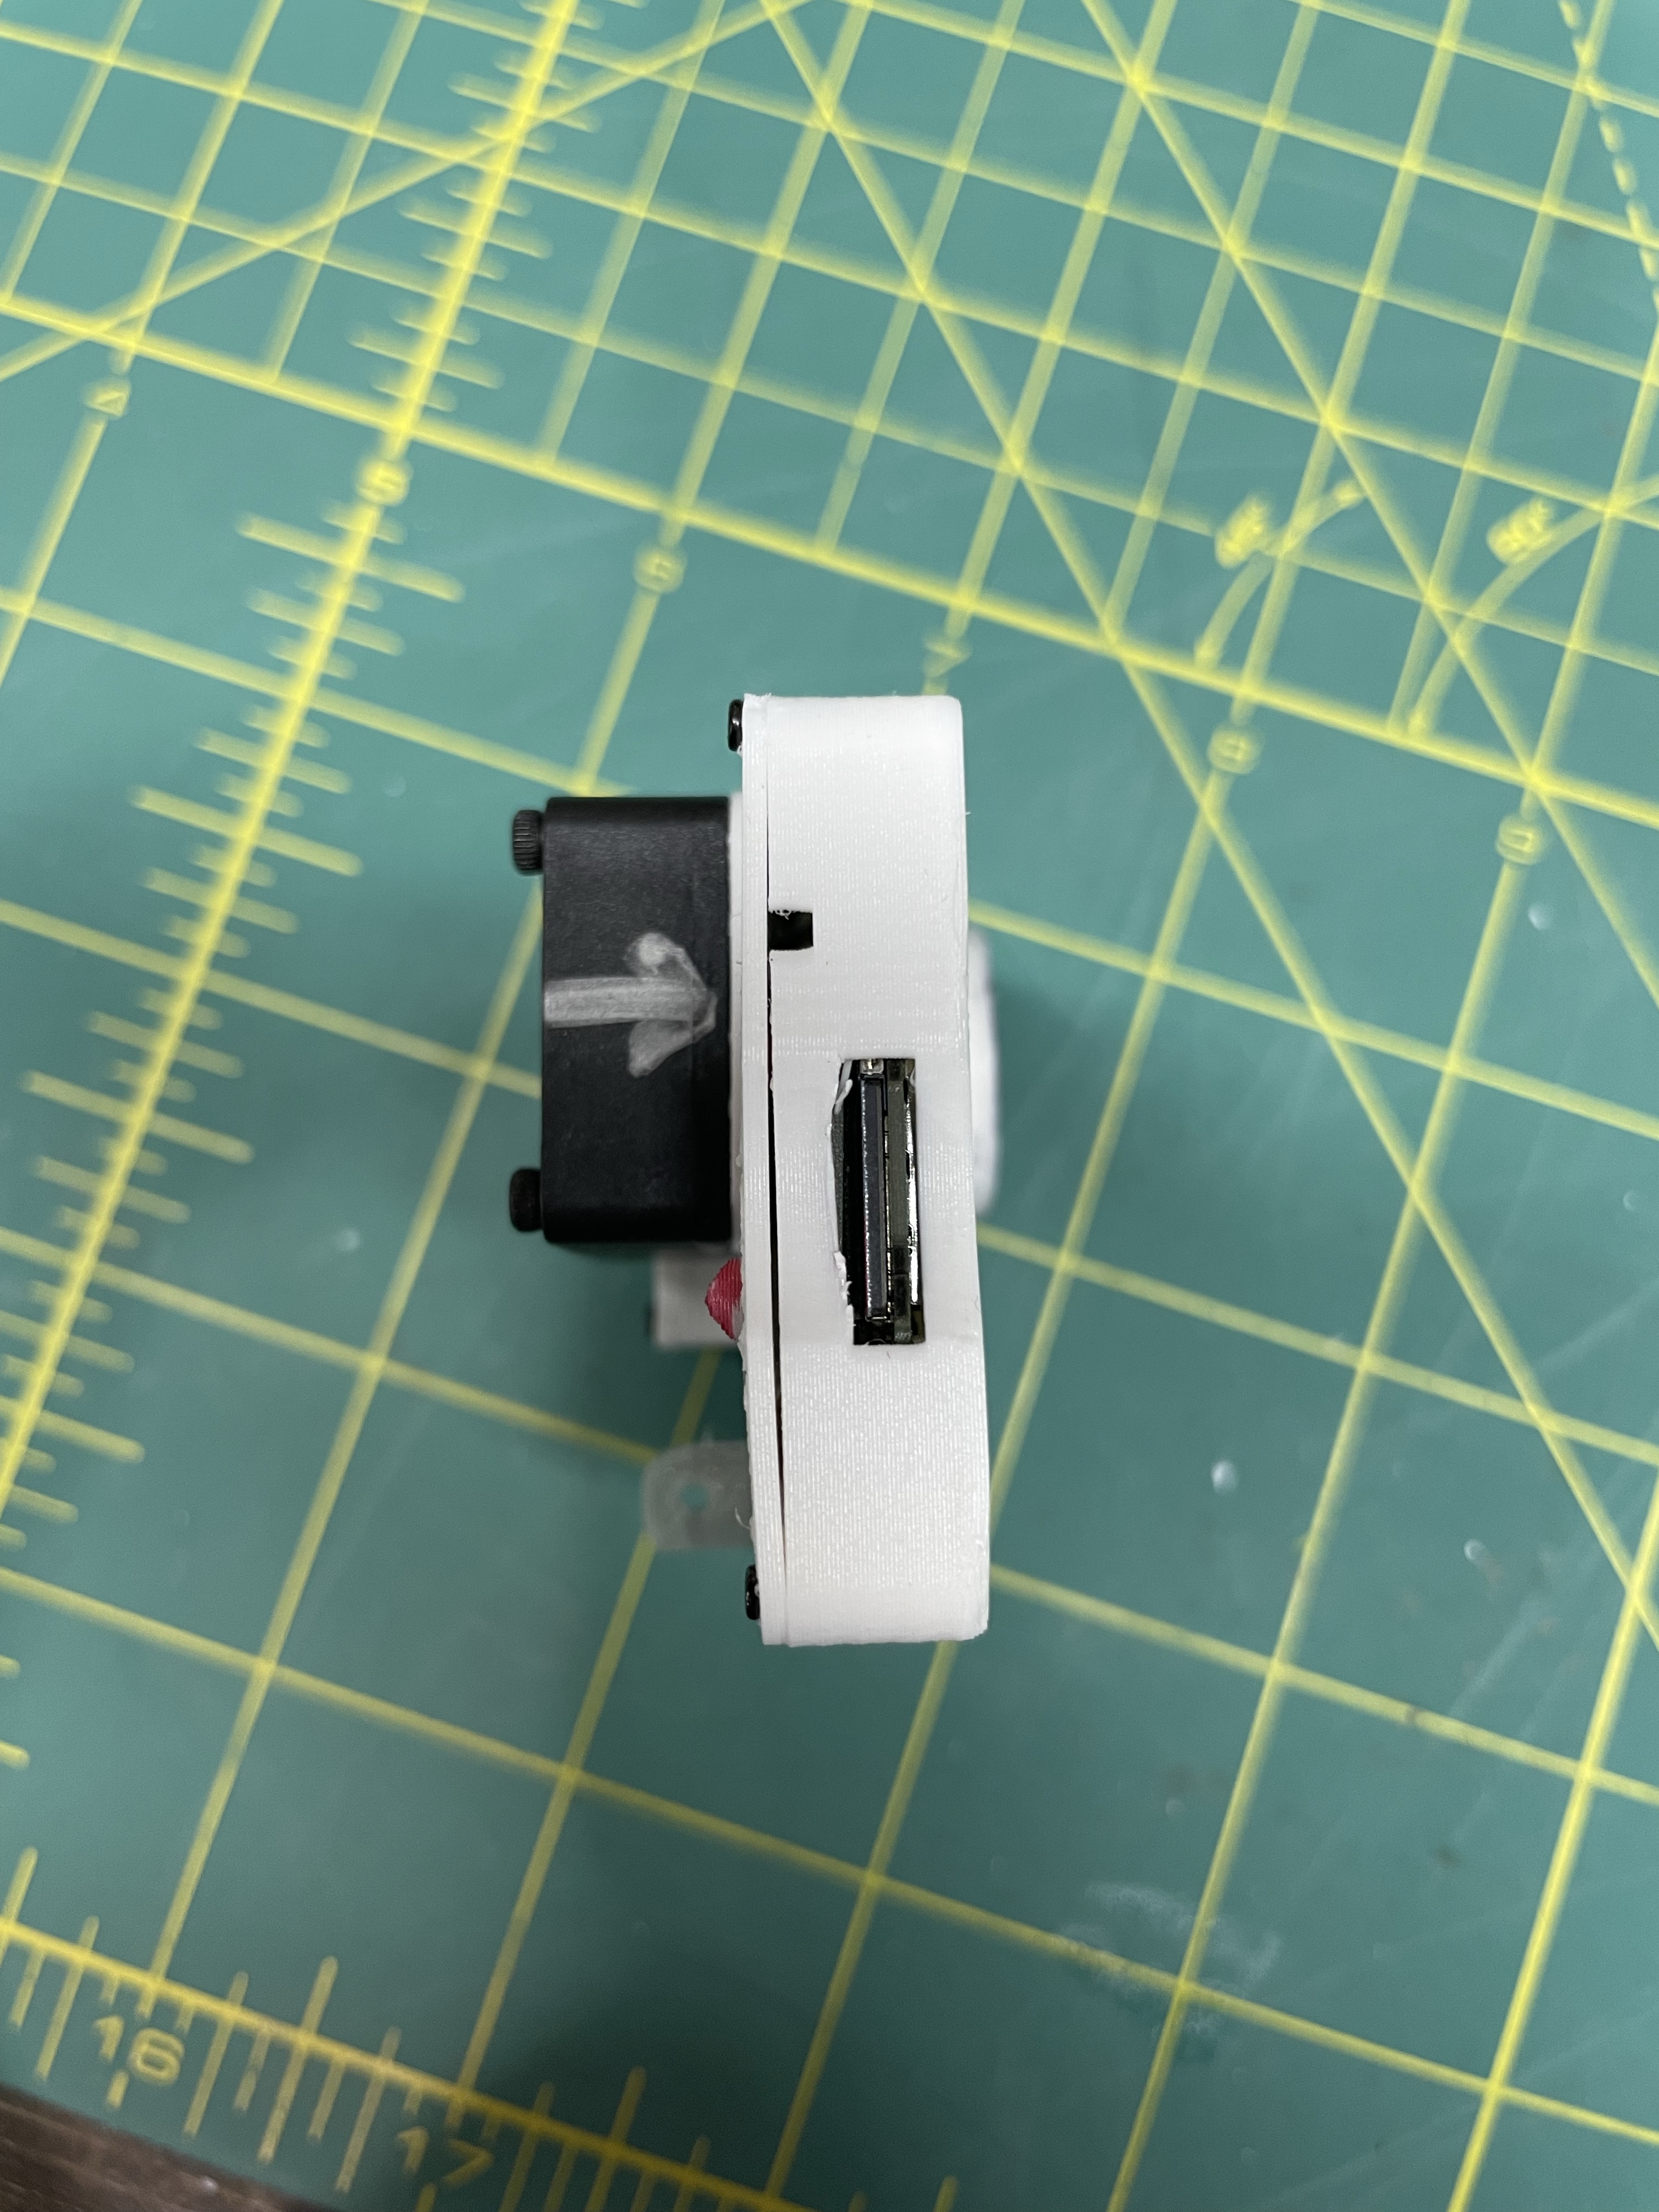
Have you notice that hole over the SD card? That is for the record red LED.
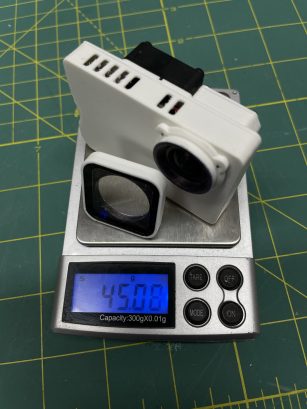
Weight
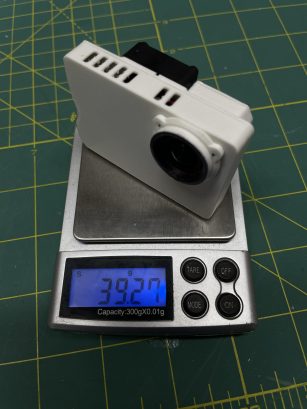
Those 4 m3 screws that hold the fan are the most heavy on this setup.
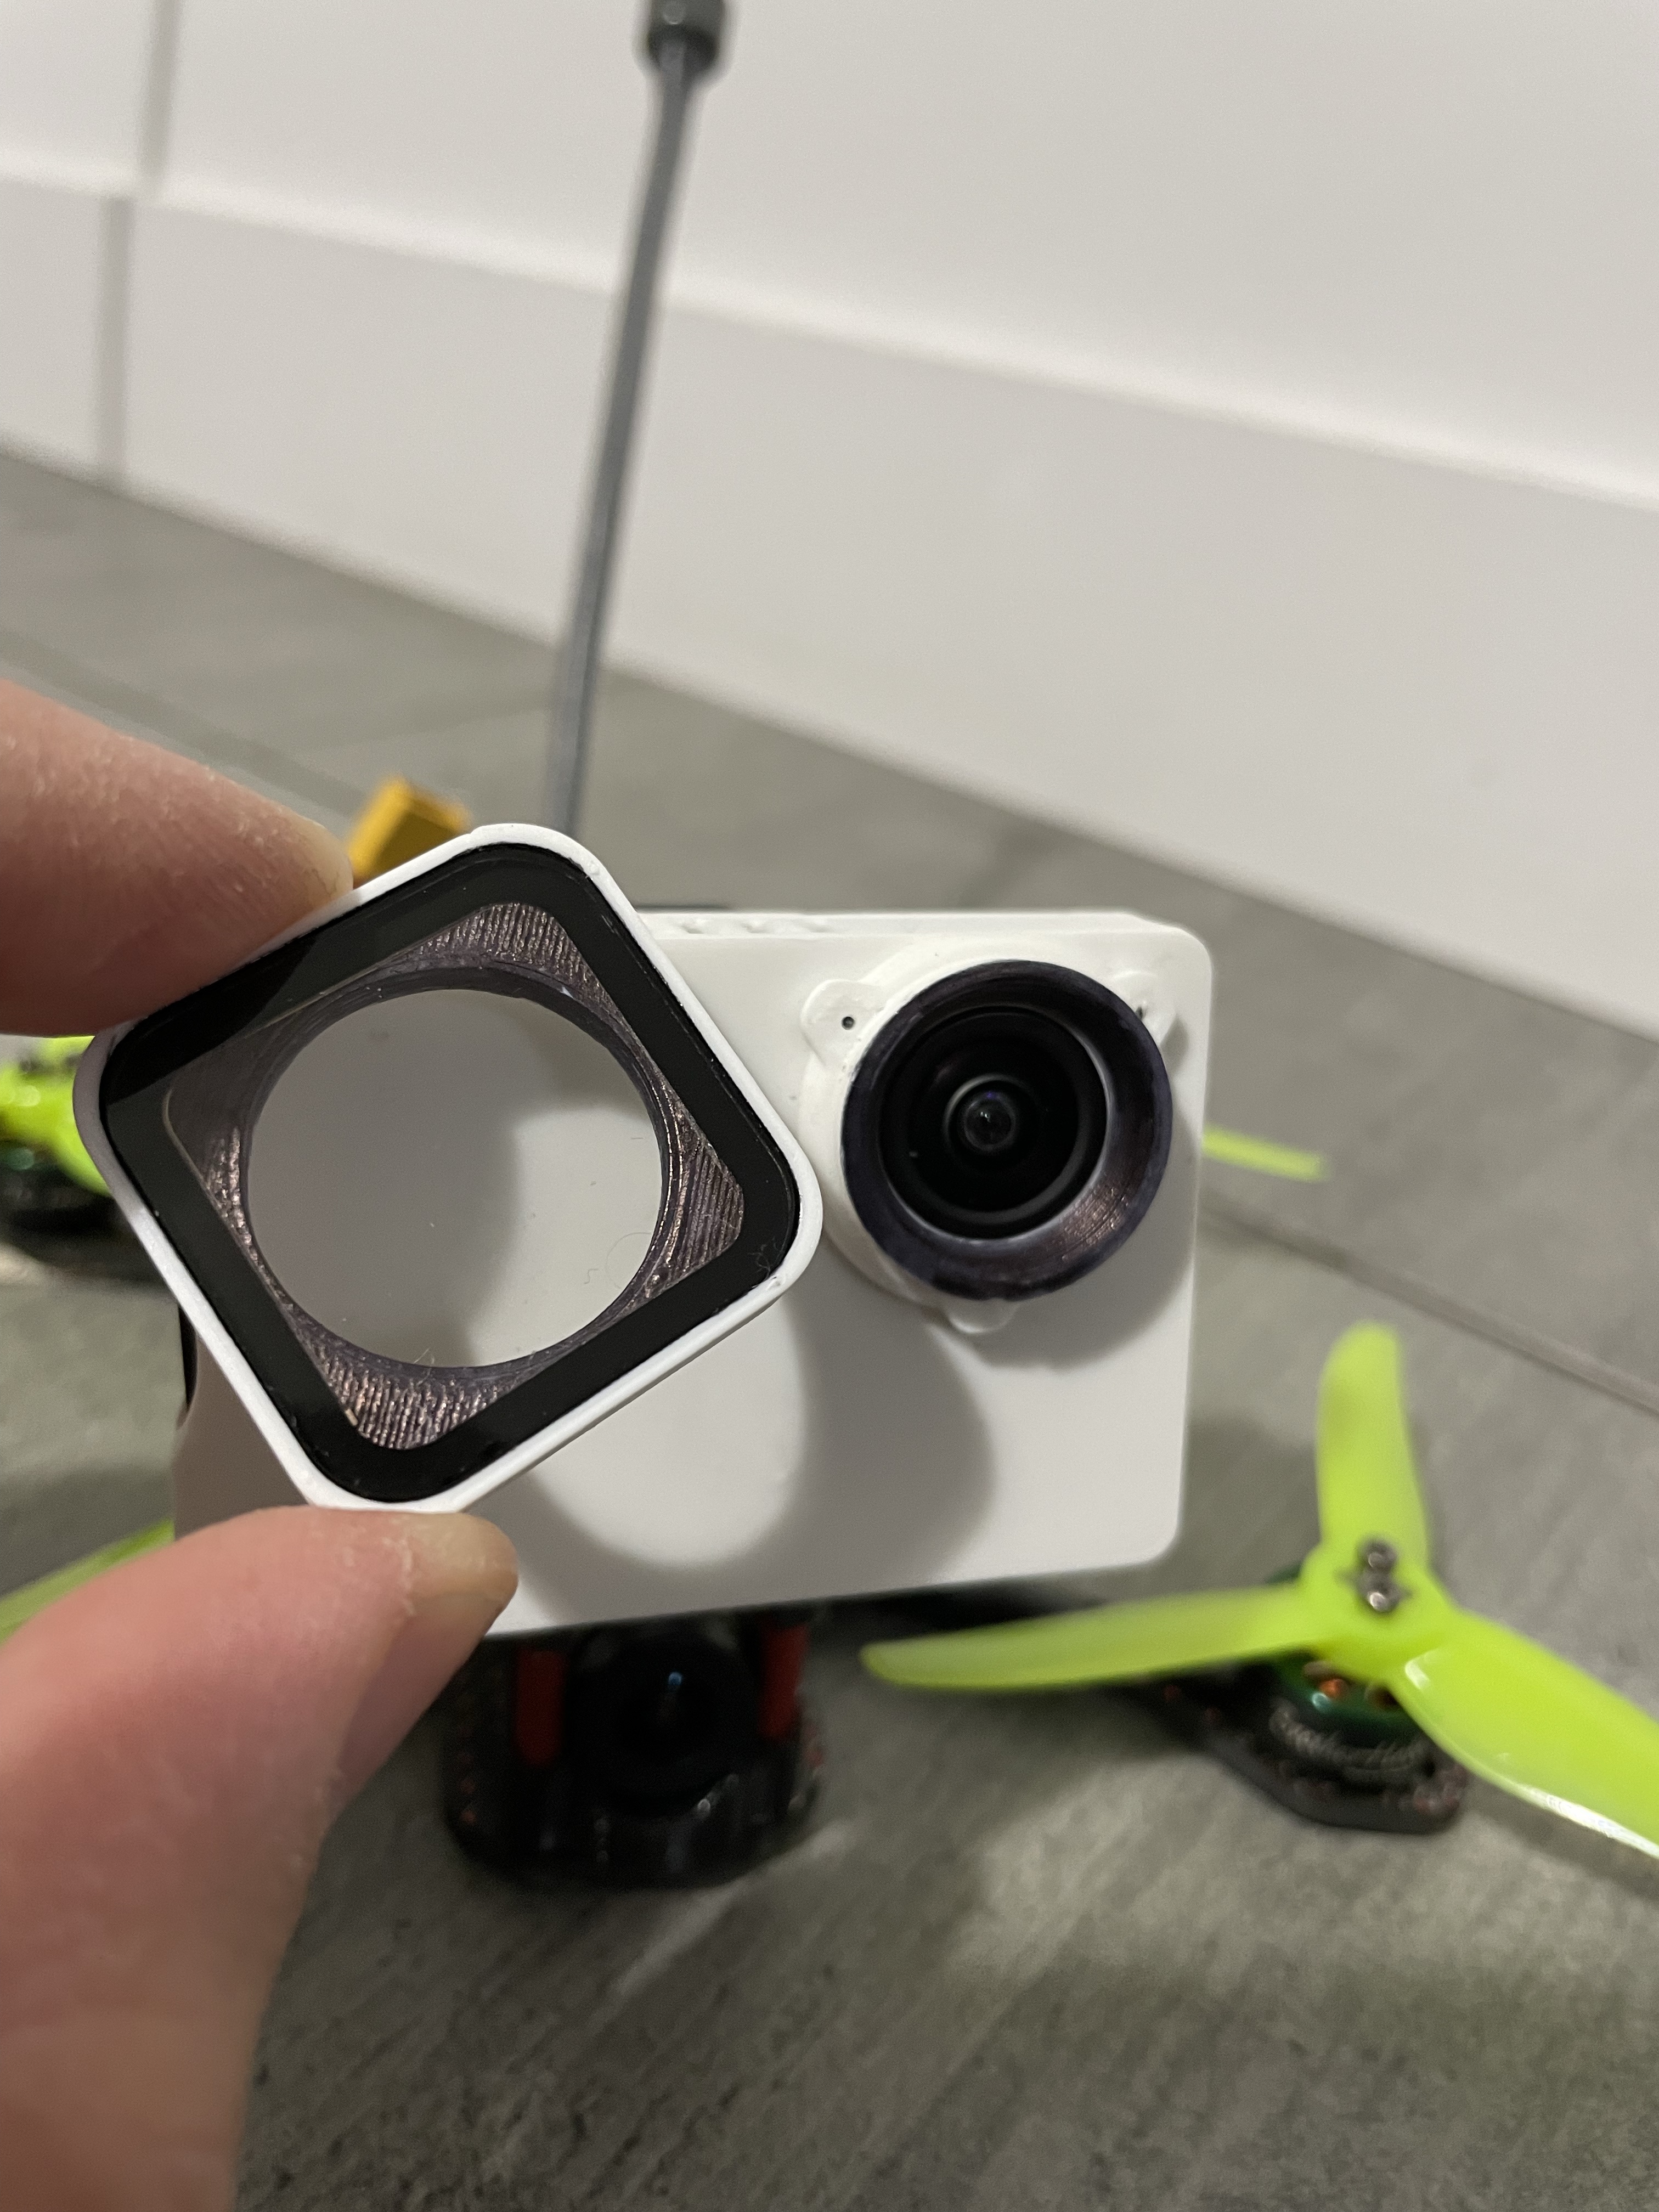
With hero8 lens protector
test result
Testing